Outlook 2016
Topics
Encryption and IT Security
- How do I create an encrypted e-mail and/or a digital signature?
- How do I read an encrypted e-mail?
- What should I do with spam e-mail?
- What is phishing?
- What does the banner on incoming external e-mails mean?
- What do I do if the Virus Alert warning appears?
- What do I do if I receive a prompt to enter my network login credentials?
Sending E-mail
- How do I add a reminder for myself to an e-mail?
- How do I attach a file to an e-mail?
- How do I manually correct emails using Antidote?
- How do I include a reminder in an e-mail message?
- How do I attach an Outlook item to an e-mail message?
- How do I have my signature automatically included in an e-mail?
- What is the maximum size of an e-mail?
- How do I send an e-mail that will remind me to follow up?
Managing E-mail
- How do I set up an auto-reply e-mail message (Out of Office)?
- How do I create a new contact?
- How do I create a signature block for an e-mail?
- How do I move an e-mail message to a different folder?
- How do I recall or replace a message I've already sent?
- How do I recover deleted e-mail messages?
- How do I empty the Recover Deleted Items container?
- How do I set-up an e-mail rule?
- How do I label a colour-coded e-mail category?
- What is the size of my mailbox (i.e. How much computer memory am I using)?
- How do I edit the subject line of an e-mail I have received?
- How do I add a classification label?
- How do I set up classification labels?
- How do I add a flag automatically, using a rule?
Style
- How do I add a field or column?
- How do I add a personal image to my Outlook profile?
- How do I change my contact and personal information in Outlook?
- How do I customize the left-hand navigation features?
- How do I change the size of my display font in Outlook?
- How do I change the default font style for my e-mail?
- How do I change the size or formatting of text?
- How do I restore the default font style for my email?
GD Account
- How do I set-up a mailbox autoreply?
- How do I determine who is the owner or manager of a GD Account?
- How do I manage the membership of a GD account?
- How do I obtain permission to send e-mail from a GD Account?
- How do I send an email on behalf of a GD account?
- How do I open Outlook as another user, e.g. as a GD account (multiple profiles)?
- How do I remove a GD account from my Outlook?
- My issue is not in this list
How do I use Outlook on the Web?
It is possible to access your Employment and Social Development Canada (ESDC) email through a web browser, without launching the Outlook 2016 software. Note that to do so, you must be connected to the ESDC network (i.e., either in an ESDC office, or remotely connecting through Virtual Private Network [VPN] or AppGate).
Outlook on the Web replaces Outlook Web Access. Upgrades are currently underway to the departmental email system. If your mailbox has been migrated to a newer version of Microsoft Exchange, you will now use Outlook on the Web when accessing your email through a web browser.
To access your personal ESDC email account with Outlook on the Web:
- Using your computer's web browser (e.g., Internet Explorer), visit the Outlook on the Web Internet site
- Enter the same username and password that you use to login to Windows.
The appearance of Outlook on the Web is generally the same as in Outlook, with similar functionality and menus.
To add a shared mailbox so it displays under your primary mailbox:
If you want to monitor the email from your primary mailbox and the shared mailbox at the same time, use this method. After you complete this task, the shared mailbox and its folders are displayed in the left navigation pane each time you open Outlook on the Web.
- Sign in to your account in Outlook on the Web.
- Right-click the name of your primary mailbox (such as Dempsey or Molly) in the left navigation pane, and then choose Add shared folder.
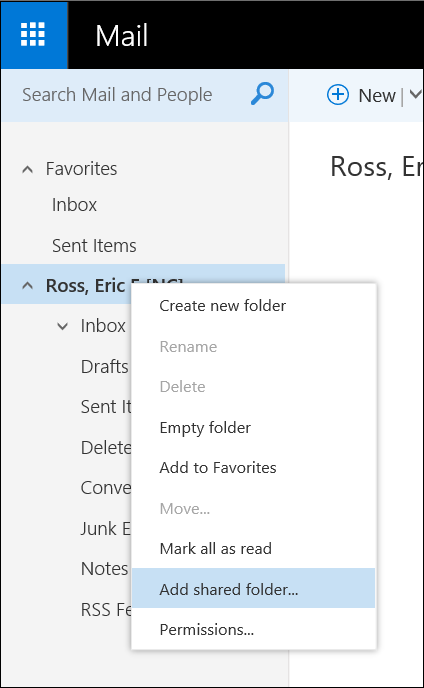
- In the Add shared folder dialog box, type the name or email address of someone who has shared a mailbox with you, and then click Add. Or, type the name of the shared mailbox you are a member of, such as a general delivery mailbox

The shared mailbox displays in your Folder list in Outlook on the Web. You can expand or collapse the shared mailbox folders as you can with your primary mailbox. You also can remove the shared mailbox from your Folder list. To remove it, right-click the shared mailbox, and then click Remove shared folder.
To receive notifications of new messages in a shared mailbox:
To receive notifications of new messages in the Inbox of a shared mailbox, you must open the shared mailbox in a separate browser window.
To open the shared mailbox in a separate browser window:
Use this method if you want to view and manage the email for the shared mailbox in its own browser window. This method also lets you receive notifications of new items in the Inbox of the shared mailbox.
- Sign in to your account in Outlook on the Web.
- On the Outlook on the Web navigation bar, click your avatar. A list appears.
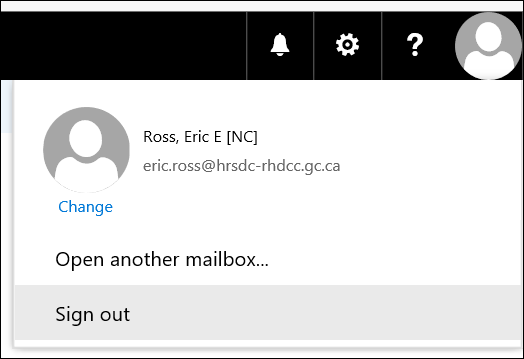
- Click Open another mailbox.
- Type the email address of the other mailbox that you want to open, and then click Open. Another Outlook on the Web session opens in a separate window, allowing access to the other mailbox.
Tip: If you mistype the email address of the mailbox, the result is "No match was found". Try typing the email address again.
To send email from the shared mailbox:
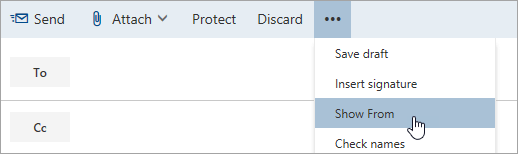
- Choose New mail above the folder list. A new message form opens in the reading pane.
- At the top of the message, choose ***> Show From.
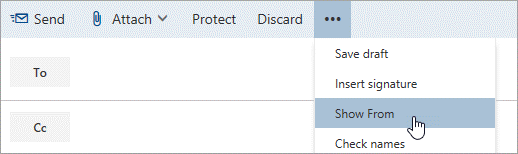
This option shows you that the people who receive the email message will see it comes from the shared mailbox and not from your own email account.
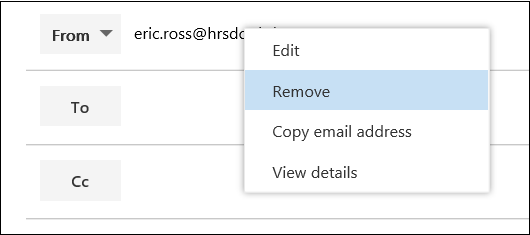
- The first time you use the shared mailbox, you need to add the address to the options available in the From drop-down list:
- Right-click the From address and choose Remove.

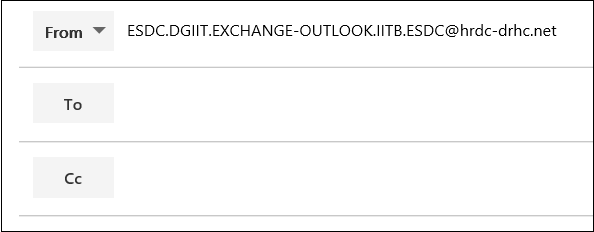
- Type the shared address. The next time you reply from the shared mailbox, its address will appear as an option in the From drop-down list.

- To add recipients, type the name of anyone who is in your contacts folder or organization's address book, or type the email address in the To or Cc box. The first time you enter a person's name, Outlook on the Web searches for that person's address. In the future, the name is cached so it resolves quickly.
- Type a subject.
- Type the message you want to send.
- When your message is ready to go, click Send.
To reply to an email sent to the shared mailbox:
The first time you reply to a message sent to the shared mailbox, you need to add the shared address to the From drop-down box. Here's how to do that:
- Open Outlook on the Web and go to your shared mailbox.
- Open a message that was sent to the shared address.
- Click Reply.
- At the top of the message, choose ***> Show From.
- Right-click the From address and choose Remove.
- Type the shared address and send the message. The next time you reply from the shared mailbox, its address will appear as an option in the From drop-down list.
To use the shared calendar:
One of the great things about using a shared mailbox is that anyone who has access to the shared mailbox also has full access to the calendar. You can create, edit, and delete events in the calendar. Use the shared calendar just as you would use your own calendar. Here's a short list of things you can do with the shared mailbox calendar:
- Let your team know when you are going on vacation or when you will be out of the office.
- Create a team meeting.
- Edit a calendar event that someone else created.
- Cancel a meeting that someone else created.
To access the shared calendar, do the following:
- Sign in to your mailbox using Outlook on the Web, and then select Calendar.
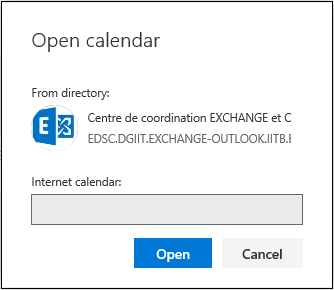
- Right-click Other Calendars, and then click Open calendar.
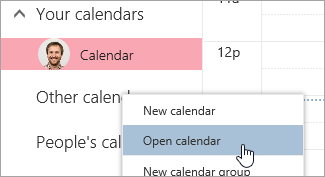
- In From directory, search for the shared calendar you want to open. Select the shared mailbox you want to open, and then click Open.
- The shared calendar displays in your Calendar folder list.
To send automatic replies from a shared mailbox:
Only your Exchange Administrator has permission to set up the ability to send automatic replies from a shared mailbox.
Why do I keep experiencing Outlook performance issues?
Enabling Cached Exchange Mode in Outlook
The following instructions offer a potential solution if you are experiencing poor Outlook performance that includes any of the following:
- Outlook freezes frequently and/or for prolonged periods; or
- Outlook repeatedly indicates it has lost connection to the Microsoft Exchange server; or
- You frequently receive a pop-up message in Outlook that indicates a technical issue is occurring.
Changing this setting does not resolve all performance issues in Outlook. It is NOT recommended if any of the following circumstances apply:
- Your e-mail mailbox size is above 5GB (this is very large, and is rarely the case). Five gigabytes are equal to five million kilobytes.
- You use a shared workstation as part of your job.
Enabling the following setting under any of the above circumstances may introduce new performance issues that cancel out the benefits.
Activating the Cached Exchange Mode Setting
If none of the above exceptions apply, try activating the following system setting to see whether this improves Outlook's performance:
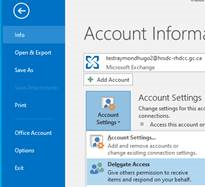
- In Outlook, on the File ribbon menu, select Info from the left-hand menu. In the Account Information pane, select Account Settings, and then choose Account Settings again from the drop-down menu that appears.
- In the Account Settings window, select the E-mail tab and choose Change…
- In the Change Account window, in the Offline Settings section place a checkmark next to Use Cached Exchange Mode.
- Note: if you discover this setting already has a checkmark, this indicates that it is not resolving your Outlook performance issue. You will need to submit an online request to the National Service Desk for additional assistance (and inform them that you have already tried activating Cached Exchange Mode).
- Select the Next button; if a pop-up message appears, select OK to close it
- Then select Finish and Close.
- You will need to restart Outlook (close, then re-open) for this change to take effect.
Note that your mailbox may at first appear to be empty when you restart Outlook after changing this setting. You have not actually lost any e-mail; this is a temporary situation, and your e-mail will gradually begin to reappear. You can observe the progress of its restoration in the status bar at the bottom of the Outlook window, concluding with a message to say that all folders are up to date. This is a one-time issue and should not occur again.
If you encounter the following message and have any questions or require further assistance, please submit an online service request to the National Service Desk.
Due to current network conditions, some server results may not be included in your search.
If you continue to experience Outlook performance issues (or they resume), you will need to submit an online request to the National Service Desk for assistance. In the description of your issue, be sure to mention that you have already tried Cached Exchange Mode.
How do I book a meeting room or other shared resource?
Note: some resources are only available through the iService Boardroom Booking Services
- In Outlook, switch to Calendar view (e.g. press Ctrl + 2 on your keyboard)
- On the Home ribbon menu in the Manage Calendars group, select Open Calendar and choose From Room List…
- In the Select Name: All Rooms window, under the title Address Book, open the drop-down menu and select the appropriate regional resources address book (ON Resources; QC Resources; etc.)
- With the correct address book selected, choose (highlight) the shared resource from the list below. Select the Rooms button to confirm your selection and then use the OK button to open the calendar entries for that resource
- On the Home ribbon menu in the Arrange group, select Schedule View
- Highlight the timeframe in the resource's schedule that you want to reserve. On the Home ribbon menu in the New group, select New Meeting and choose the New Meeting with All option from the drop-down menu. The resource name will automatically be entered in the To field (as Resources) and in the Location field.
- Complete other information (To, Date, Time, Subject, etc.) as required and then select Send.
WARNING: Never book a shared resource for an All day event. This will cause serious problems with the resource booking. Also, DO NOT indicate your reserved timeslot as Free since that will allow the possibility of double booking.
- You may receive a warning message, stating "You are not allowed to send mail to: {Room or resource name}". This message is normal and does not prevent the reservation of the resource. Select OK to proceed and send the e-mail to finalize your booking.
Possible Error message: you may see the message "You marked {resource name} as a resource. You cannot schedule a meeting with {resource name} because you do not have the appropriate permissions for that account." If you see this error message, you will need to contact the owner of the resource to do the booking.
Why should I reduce my calendar size?
Employment and Social Development Canada (ESDC) recommends keeping the size of your mailbox below 2 gigabytes (GB). As such, if your mailbox is above this threshold, you should take steps to reduce its size. The larger the mailbox, the longer it takes to access. You are encouraged to make room by deleting old mail and calendar items. Visit the Information Management tips for managing your inbox.
What you might not realize is that your calendar contents also contribute to the overall size of your mailbox. Any attachments (e.g., Word documents or PowerPoint presentations) can quickly use up a lot of space. Visit the Information Management tips for managing your calendar.
How do I create an encrypted e-mail and/or a digital signature?
Entrust must be used when sending encrypted files/emails internally and between other Government of Canada (GoC) departments. The recipient of the encrypted material must be listed in your GoC Outlook address book.
To create an encrypted email:
- Ensure you are logged into Entrust.
- Open a new email and complete it as necessary (content and attachments).
- On the Message ribbon menu in the Security group, select (highlight) Encrypt. Your email is now encrypted and ready to send.
How do I read an encrypted e-mail?
You will know you have received an encrypted e-mail if there is a small lock on the unopened e-mail icon.
When you attempt to open an encrypted e-mail, the Entrust login window will appear. Your username will be prefilled if you have previously logged onto Entrust. Enter your MyKey password and select the OK button. This will decrypt the e-mail and open it.
Follow the steps to log into Entrust if you receive an error message.
What should I do with spam e-mail?
Spam is unsolicited e-mail that is usually trying to sell you something. You do not need to report a spam e-mail message and it can simply be deleted. Do not follow its hyperlinks or open any attachments in case it attempts to deliver a virus.
More information about Spam and Phishing is available through the IT Security portal.
What is phishing?
Phishing e-mails must be reported as soon as possible. More information about phishing is available on iService through the IT Security portal in the Do's and Don'ts section for Spam and Phishing.
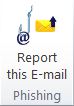
To report a suspected phishing e-mail, highlight the e-mail message in your Inbox and click the Outlook button "report this E-mail Phishing".
The suspicious e-mail will automatically be:
- reported to IITB for investigation; and
- moved to your "Deleted Items" folder (don't forget to empty the folder to eliminate any trace of the e-mail).
There is nothing further for you to do after. You will be contacted should issues requiring further action arise.
Remember:
- DON'T click on links or open attachments from suspicious e-mails.
- DON'T reply to the e-mail.
- DON'T provide any personal or business information.
- DON'T click "Unsubscribe" on spam e-mails as doing so will validate your e-mail address.
What does the banner on incoming external e-mails mean?
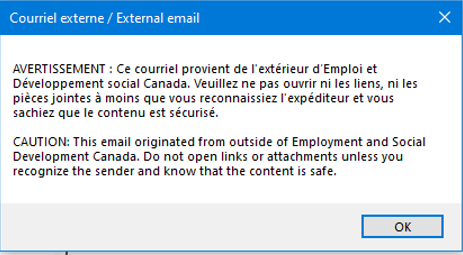
An informational banner is automatically added to all emails originating from an external source (outside of ESDC). This banner is a reminder for employees to be cautious and check the validity of the source before opening any links or attachments. If you see a banner on an internal e-mail, you can contact the National Service Desk to open a ticket.
Note: This banner does not appear on external e-mails received on mobile devices as it is not supported at this time.
Outlook 2016 Banner:

Outlook on the Web (OWA) Banner:

When you select the banner, a dialog box will open with more information:
What do I do if the Virus Alert warning appears?
Outlook may display one of the following alert messages when you open an e-mail, or one that is similar:
- "ScanMail has detected one or more virus originating from your attachment"
- "ScanMail has detected one or more attachments containing a virus"
- "ScanMail has detected one or more attachments containing a virus originating from your account"
Delete the e-mail immediately, and empty the Deleted Items folder.
If you have not received a warning message but you suspect an e-mail might have a virus, delete it and empty the Deleted Items folder. No further action is required.What do I do if I receive a prompt to enter my network login credentials?
If you continually receive a security popup window while using Outlook that is requesting you to enter your network username and password, you can try one of the following solutions:
Solution 1: Expired SharePoint Permission(s)
It is possible your computer profile is attempting to access a SharePoint or other list that you are no longer part of.
- In the main Outlook window, select the File ribbon menu and choose Account Settings, then Account Settings…
- In the Account Settings window, select the SharePoint Lists tab
- Select (highlight) any SharePoint list that you no longer have access to and select Remove. Repeat for any other SharePoint site you no longer use
- Select the Close button to exit this window
Solution 2: Reset your automatic logon credentials
The stored information about your username and password may have become corrupted. Note: this corrective process requires you to restart your computer.
- Close Outlook
- In the Windows Start menu, choose Control Panel
- Select User Accounts and then Credential Manager
- In the Generic Credentials section, you can proceed with this solution if you see a line that contains your email address and your saved password information (masked for privacy purposes)
- Using the drop-down arrow to the right of your email address, select Remove from vault
- Restart your computer
The next time you open Outlook, the security popup window should no longer appear.
How do I add a reminder for myself to an e-mail?
- Do one of the following: in an open e-mail message, from the Message ribbon menu, in the Tags group, select Follow Up; OR: in the message listing, highlight the message that you want to attach a reminder to and from the Home ribbon menu, in the Tags group, select Follow Up
- Choose the type of reminder that you want (or, if you prefer to set a specific time and date, choose Custom… and in the Custom window select the Reminder check box, then enter your preferred date and time to be reminded)
How do I attach a file to an e-mail?
You can attach files to e-mail in Outlook. The attachment is usually a document:
- In your e-mail window, on the Message ribbon menu, in the Include group select Attach File (or on the Insert ribbon menu in the Include group).
- Browse to and select the file that you want to attach, then choose the Insert button.
You can also drag files from folders on your computer and drop them on the message window to include them as attachments. This can also be done with an email from Outlook's message list.
How do I include a reminder in an e-mail message?
If you want to prompt someone to act on or respond to your e-mail message, you can send a reminder for the recipient with a flagged message.
IMPORTANT: use discretion when you attach a reminder. Some recipients may not welcome an imposed e-mail reminder, depending on circumstances.
- In a new message, on the Message ribbon menu in the Tags group, select Follow Up and then choose Add Reminder…
- In the Custom window, check the box next to Flag for Recipients (also, you may check or uncheck to flag the Flag for Me option)
- Next to Flag to, select the type of reminder that you want to attach from the drop-down list
- Check the Reminder checkbox to set a date and time for the reminder to appear.
How do I attach an Outlook item to an e-mail message?
You can attach Outlook items to your message including other email or calendar items.
In a new message, on the Message ribbon menu, in the Include group select Attach Item. From the drop-down menu select one of the following options:
- Business Card > Other Business Cards … to attach information about one of your contacts. To select multiple contacts, hold the CTRL key on your keyboard as you choose each contact
- Calendar… to select the calendar, date range and degree of detail to include
- Outlook Item to browse through your email folders (Look in) and select the item you want to attach (Items)
How do I have my signature automatically included in an e-mail?
To edit and include a signature block automatically in your e-mail:
- In the main Outlook window, select the File ribbon menu. From the left-hand menu select Options
- In the Outlook Options window, select Mail from the left-hand menu.
- In the Compose messages section, select the Signatures… button
- In the Signatures and Stationery window, select the E-mail Signature tab
- The Select signature to edit section shows the currently selected signature to include in your emails, and a preview is displayed in the Edit signature section below. If nothing is listed, use the New button to create a signature in accordance with departmental guidelines for Email signature blocks (DOC, 30 KB).
- In the section Choose default signature:
- Next to New messages, select the signature you want to have automatically appear in each new message you create
- Next to Replies/forwards, select the signature you want to have automatically appear in each reply or message you forward
- Select the OK button to save any changes you've made
What is the maximum size of an e-mail?
The maximum size of an e-mail that can be delivered on the ESDC network, with or without attachments, is 20 MB for internally-addressed e-mail and approximately 13.5 MB for externally addressed e-mail.
To view the size of an e-mail you are composing, you must first save it as a draft (using the Save icon in the Message window's top-left corner). Then select the File ribbon menu. The size of that email is displayed in the Properties section. Note that any size in KB is less than 1 MB.
How do I send an e-mail that will remind me to follow up?
If you are sending a message that you will later want to take additional action on or remember to check for responses about, you can attach a reminder for yourself to the message before you send it.
- In the message window, on the Message ribbon menu in the Tags group, select Follow Up and choose Add Reminder
- In the Custom window, select a type of reminder from the Flag to drop-down list. This information will appear in the InfoBar of the message
- Select a date and time for the reminder, using the lists next to the Reminder check box. This will also appear in the InfoBar.
How do I set up an auto-reply e-mail message (Out of Office)?
Microsoft Outlook 2016 can automatically respond to people who send you an email message when you aren't in the office. Your automatic reply can include details such as your expected return date and alternate contact information.
To compose and activate an automatic reply:
- Select the File ribbon menu. In the Account Information panel, choose Automatic Replies
- In the Automatic Replies window, select Send automatic replies.
- Specify a start and end time (e.g. for the period you are on vacation) by selecting the Only send during this time range checkbox and choosing appropriate dates and times.
- On the Inside My Organization tab, type the response you want to have sent to teammates or colleagues during this period (e.g. when you expect to return, and who to contact in your absence). If you work in a bilingual position, your response should be in both official languages
- You may prefer not to use the Outside My Organization tab to avoid responding to junk mail, phishing attempts, etc. If your work requires that you use this option: select this tab and then select the Auto-reply to people outside my organization check box. Type the response you want to make to e-mail coming from outside the Department while you are out of the office.
Rules for Automatic Replies
Rules automatically manage incoming e-mail by specifying the action Outlook should take. For example, you can create rules to automatically move or copy messages to other folders, to delete certain messages, or to send automatic replies only if certain conditions are met.
To create or edit a rule for automatic replies:
- Select the File ribbon menu, and in the Account Information pane choose Automatic Replies
- In the Automatic Replies window, select the Rules… button (bottom-left)
- In the Automatic Reply Rules window, select the Add Rule… button
- In the Edit Rule window, in the section When a message arrives that meets the following conditions, specify the conditions that the message must meet for the rule to be applied. If you want to specify more conditions, select the Advanced… button, enter or select the advanced options that you want, and then choose OK
- In the section Perform these actions, select the actions that you want to be taken. You can select more than one action.
- Select the OK button to close each window.
To turn each Automatic Replies rule on or off, in the Automatic Reply Rules window select (or clear) the checkbox for the rule that you want to turn on or off.
How do I create a new contact?
- In the main Outlook window, on the Home tab in the New group select New Items and choose Contact (or press CTRL + SHIFT + C on your keyboard)
- Enter a name and any other information that you want to include for the contact
- Then do one of the following:
- To finish entering contacts: on the Contact ribbon menu in the Actions group, select Save & Close
- To save this contact and start another: on the Contact ribbon menu in the Actions group, select Save & New
- To save and enter another contact from the same company or address: on the Contact ribbon menu in the Action group, select the down arrow next to Save & New, and then choose Contact from the Same Company
How do I create a signature block for an e-mail?
You can create one or more signatures to include in your e-mail. You can also edit a signature block or delete one you no longer need. Remember to use Departmental guidelines for email signature blocks (DOC, 31 KB).
- In the main Outlook window, on the File ribbon menu select Options from the left-hand menu and then select Mail and then choose the Signatures button; OR in a new message on the Message ribbon menu in the Include group, select Signature
- In the Signatures and Stationary window, on the Email Signature tab under Select signature to edit:
- To create a new signature: select the New button
- To edit a signature: highlight the signature in the list and make your changes in the Edit signature section, then use the OK button to save your changes
- To delete a signature: highlight the signature and use the Delete button
- Use the OK buttons to close this windows sequence
How do I move an e-mail message to a different folder?
Method 1: from the folder view
- Right-click the message and select Move. Choose a destination folder from the list provided, or choose Other Folder… to select one that is not listed
Method 2: in an open message
- Select the File ribbon menu and choose Move to Folder. Choose a destination folder from the list provided, or choose Other Folder… to select one that is not listed
How do I recall or replace a message I've already sent?
If you have sent an e-mail in error, or that contains errors, you may be able to request a recall or replace the message before it is read provided you do it quickly.
- In the main Outlook window, select your Sent Items folder and open the message you want to recall or replace.
- In the message window, on the Message ribbon menu in the Move group, select Actions…
- Select Recall this message and then do one of the following:
- To recall this message, choose the option Delete unread copies of this message.
OR: to replace this message, choose the option Delete unread copies and replace with a new message. - To be notified about the success of the recall or replacement for each recipient, select Tell me if recall succeeds or fails for each recipient .
- Use the OK button to close this window. If you chose to replace the message, you are provided with an editable version of the original.
- To recall this message, choose the option Delete unread copies of this message.
How do I recover deleted e-mail messages?
If you have deleted a message and it is no longer available in your Deleted Items folder, you may still be able to recover it. In the main Outlook window:
- On the Folder ribbon menu in the Clean Up group, select Recover Deleted Items
- In the Recover Deleted Items window, select (highlight) the item to be restored. To recover multiple items, hold down the CTRL key while selecting additional choices.
- When you are finished, ensure you have selected the Recover Selected Items radio button. Then select OK. The item(s) will restored to your Deleted Items folder
How do I empty the Recover Deleted Items container?
Before emptying the Recover Deleted Items container, be absolutely sure the items you select are safe to delete forever. They cannot be recovered once the items have been purged.
- On the Folder ribbon menu in the Clean Up group, select Recover Deleted Items.
- In the Recover Deleted Items window, select (highlight) the item to be permanently deleted (purged). To delete multiple items, hold down the Ctrl key while selecting additional choices.
- When you are finished, ensure you have selected the Purge Selected Items radio button. Then select OK. The item(s) will be permanently deleted.
How do I set-up an e-mail rule?
Select (highlight) an example of the e-mail you want to create this rule for; then:
- In the main Outlook window on the Home ribbon menu, in the Move group select Rules and then Create Rule…
- Select the condition(s) and the action(s) that will apply to future e-mails
- Note that the first condition refers to the sender of the most recent e-mail you've selected. If you want to associate a rule with a different sender, close this window with the Cancel button and select a different e-mail, then return here
- The Move the item to folder action can be used to send unwanted e-mail to the "Junk" or "Deleted Items" folder, or to file important e-mail in specific folders
- The Advanced options… button provides more specific conditions that can be applied to future e-mails
- Select OK to confirm this rule
Repeat steps 1 and 2 for each rule you want to create.
How do I label a colour-coded e-mail category?
Outlook uses categories to help you colour-code your e-mail, if you find this helpful for showing at a glance what certain e-mails are relevant to. You can create a label for each colour you will use.
- In the main Outlook window, on the Home ribbon menu in the Tags group, select Categorize
- Select the All Categories… option
- In the Color Categories window, highlight the current name next to a colour you wish to use, then select the Rename button on the right
- The name is now editable; type your preferred label for this colour, and then press the Enter key on your keyboard
- Repeat steps 3 and 4 for any other colours you wish to use and label
- Select OK when finished, to save your changes and close this window.
What is the size of my mailbox (i.e. How much computer memory am I using)?
Visit the Information Management tips for managing your inbox.
- Select the File ribbon menu. In the Account Information panel, choose Cleanup Tools; from the drop-down menu, select Mailbox Cleanup.
- In the Mailbox Cleanup window, select the View Mailbox Size… button. The size of your mailbox is displayed in kilobytes (KB) on the second line of the Server Data tab.
Here is a helpful conversion chart, if you need to understand your mailbox size in other measures:
- 1,000 KB = approximately 1 MB (megabyte)
- 1,000,000 KB = approximately 1GB (gigabyte), or 1,000 MB (megabytes)
How do I edit the subject line of an e-mail I have received?
Sometimes you may prefer to edit the subject line of an e-mail before you save it to another folder, or perhaps to shorten it for cross-referencing purposes. If you are unable to do this, you may need to expand the header portion of the e-mail:
- Look at the far right of the e-mail's header portion. Just below the indicated time when the e-mail was sent; you will see an arrow pointing down.
- Select this arrow to expand the header portion of the e-mail. You should now be able to edit the subject line.
How do I add a classification label?
Categories can be used to organize your e-mail by classifications. These classifications are only seen in your own mailbox. To add a classification category to an e-mail:
- Select an e-mail in your e-mail list (i.e. highlight it). On the Home ribbon menu in the Tags section, select Categorize
- Tag your email with the appropriate classification category, using either the generic colour classifications or new labels you previously created using the All Categories option.
How do I set up classification labels?
Note: These steps only need to be completed once for each classification.
- In the main Outlook e-mail window (not in a message) select the Home ribbon menu. In the Tags section select Categorize and choose All Categories.
- Select the New … button.
- In the Add New Category window, type a name for the new category (e.g. Unclassified, Protected A, Protected B, etc.) then select OK.
Repeat these steps for each new classification.
How do I add a flag automatically, using a rule?
Applying a flag to a message or a contact in Microsoft Outlook gives you a visual reminder to follow up in some way. You can use flags with default dates (e.g. Today, Tomorrow, Next Week), or customize your flags with specific dates:
- From the File ribbon menu, in the Account Information panel select Manage Rules & Alerts.
- In the Rules and Alerts window, on the E-mail Rules tab choose New Rule
- In Step 1, under the Stay Organized section select Flag messages from someone for follow-up
- In Step 2, edit the rule description to indicate when this rule should be applied and to choose which type of flag should be attached
How do I add a mailbox to my Outlook?
- In the main Outlook 2016 (not an open e-mail) select the File ribbon menu
- In the Account Information panel, select Account Settings and choose Account Settings… from the drop-down menu.
- In the Account Settings window, ensure the E-Mail tab is selected and select Change...
- In the Change Account window, select the More Settings... button.
- In the Microsoft Exchange window, select the Advanced tab and then choose the Add… button.
- In the Add Mailbox window, type the complete name of the mailbox to be added.
- Select the sequence of OK buttons, then Next, Finish and Close.
If successful, you will see the new mailbox appear in your folder list. Select the arrowhead symbol to the left of the mailbox name to expand it, and make sure you have access to the sub-folders within.
If this procedure does not allow you to see the sub-folders or items in the mailbox that has been delegated to you, ask the owner of that mailbox to review steps 1 to 3 of the Mailbox Delegation procedure.
How do I delegate access to a mailbox?
How do I delegate access to a mailbox?
Delegating your mailbox means allowing another person access rights (as a delegate) to manage part or all of your Outlook mailbox. Delegation is most often used by managers who want their administrative assistant to be able to manage their e-mail and calendar.
If there will be several delegates, a dedicated distribution list may be helpful for managing the account. The list can be created for you by submitting an online request to the National Service Desk. After this list is created, you can assign permissions to this single list that will then apply to everyone in the list.
If you are the person providing a delegate with access, you must perform the following steps in your Outlook account.
Step One: Making Your Folders Visible
The following instructions will make it possible for your delegate to see your mailbox folders (e.g. e-mail, calendar, etc.):
- In the main Outlook window, at the top of the left-hand column where the list of e-mail folders is displayed, you will find the mailbox owner's e-mail address (indicating their private mailbox). Right-click on this address and select "Folder Permissions".
- In the "Outlook Today" window, select the Add… button
- Enter or search for the name of the person who will have delegate access. Select their name, and then select the Add –> button, then the OK button.
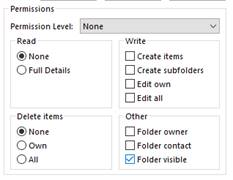
- Back in the "Outlook Today" window, select this person's name. In the "Permissions" section below, check the box next to the "Folder visible" option (note: do not change any other settings in this window).
- Select the OK button to close this window.
Step Two: Providing Access to Your Folders
Now that your delegate can see your Outlook folders, you will assign them permission to use them:
- In the main Outlook window, select the File menu. Choose "Account Settings", and then select "Delegate access".
- In the "Delegates" window, select the Add… button.
- As you did before: enter or search for the name of the person who will have delegate access. Select their name, and then select the Add –> button, then the OK button.
- In the "Delegate Permissions" window that appears for this person, you will provide permission for them to access your Calendar, Inbox and Contacts. Tasks and Notes are only relevant if you use these features.
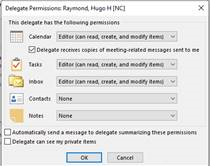
- The degree of permission you assign determines how much your delegate can do. The options are:
- None (no permission to use this)
- Reviewer (can read its contents)
- Author (can read its contents, and create new items)
- Editor (can read, create and modify its contents)
- Two checkboxes at the end provide additional options:
- Check the first box if you want your delegate to be automatically notified that you have provided these permissions.
- Check the second box if your delegate will need access to any items you have marked as "Private".
- Note that the delegate's permission level you have set for your Inbox is only for that specific e-mail folder; it does not extend to any of your other e-mail folders! It is strongly recommended that you also provide your delegate with access to your "Sent Items" and "Deleted Items" folders:
- In the main Outlook window, right-click on your Sent Items folder in the left-hand pane and select "Properties".
- In the "Properties" window for that folder, select the "Permissions" tab and then the Add... button.
- Again, as before: enter or search for and select the delegate's name, then select the Add –> button and then the OK button.
- Back in the "Properties" window, select the delegate's name. In the "Permissions" section, from the "Permission Level" drop-down menu select "Editor".
This will automatically change several of the radio buttons and checkbox settings. You can review and change any of these settings if you prefer to create your own customized permission level for this delegate. - Select the OK button when you are finished.
- Repeat these steps for your "Deleted Items" folder, and for any other e-mail folder that your delegate will need access to. Note that you do not need to do this for your "Inbox" folder; your delegate will always have access to that.
Step Three: Action Item for Your Delegate
Following the above steps will provide your delegate with access. Now inform your delegate that they need to add your mailbox to their account, in order to see and use the permissions you have provided.
- In the main Outlook window, at the top of the left-hand column where the list of e-mail folders is displayed, you will find the mailbox owner's e-mail address (indicating their private mailbox). Right-click on this address and select "Folder Permissions".
How do I add a field or column?
You can change the default fields displayed by Outlook when listing the contents of an e-mail folder, switch their order, etc.
- In the main Outlook window, on the View ribbon menu in the Arrangement group, select Add Columns
- In the Show Columns window, review the available columns in the Available Columns list using the slider bar. To add a new column: highlight your selection, then choose the Add button
- Review the Show these columns in this order list. To remove a column: highlight your selection, then choose the Remove button. To change the column order, highlight a selection and then use the Move Up or Move Down button. You can also drag and drop a selection up or down the list
- Select the OK buttons to close this windows sequence
How do I add a personal image to my Outlook profile?
Follow these instructions to add a personal image to your Outlook profile, which will then be shared with other compatible applications such as “Skype”.
Note that the Microsoft Teams application will not share the same image. That modification must be done inside Microsoft Teams.
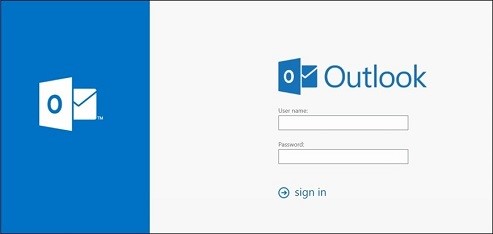
- Access Outlook on the Web using this link: Outlook sign-in
- Enter your Username and Password (the same username and password that you use to sign into Windows).
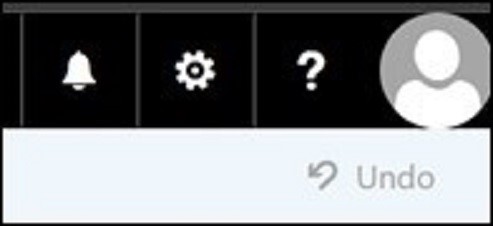
- In the upper right corner of the screen, left click on the generic avatar.
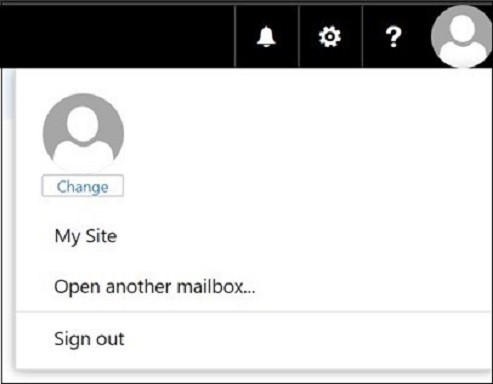
- Select the Change link under the avatar.
- Select Upload photo.
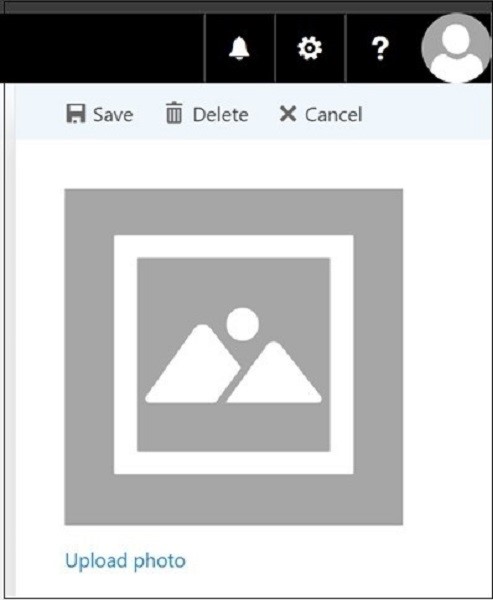
- Using the folder navigation window that opens, locate the desired photo on your computer, click Open and then click Save above your photo.
A 24-hour period is required to update the organization’s address books before your colleagues can see your new photo.
How do I change my contact and personal information in Outlook?
Your employee contact information in Outlook is generated from your profile within myEMS (SAP). Access to myEMS and related training material is available on the myEMS (SAP) intranet page.
Personal information in Outlook (PDF, 119 KB) is variously altered through myEMS or by submitting a service request by your manager, using the Human Resources Service Centre portal.
How do I change the size of my display font in Outlook?
To change the font size for the current folder:
- In the main Outlook window, from the View ribbon menu in the Current View group select View Settings
- Select the Other Settings… button
- Select the Column Font… button and choose the size, then the OK button
- Select the Row Font… button and choose the size, then the OK button
- Select the OK button to save your changes
To apply these changes to all of your other folders:
- In the main Outlook window, from the View ribbon menu in the Current View group select Change View and choose Apply Current View to Other Mail Folders…
- Select the folders to which you want to apply the changes. You can also use the checkbox Apply view to subfolders
- Select the OK button to save your changes
How do I change the default font style for my e-mail?
You can change the default font style for email, but bear in mind: some fonts can lead to printing issues, or may reduce readability. Arial and Times New Roman are known to be 100% reliable fonts and are highly recommended.
- In the main Outlook window, select the File ribbon menu and choose Options from the left-hand menu
- In the Outlook Options window, select Mail from the left-hand menu. Choose the Stationary and Fonts… button
- In the section New mail messages, choose the Font… button
- In the Font window, select the font you prefer to use in all new mail messages
- Select the OK button to save these changes. You can repeat Step 3 for the sections Replying or forwarding messages and Composing and reading plain text messages
- Select the OK buttons to save your changes and close this windows series
The new settings will take effect immediately for anything you have changed (new, reply, forward, etc.)
How do I change the size or formatting of text?
To change the size of text: select the text that you want to change, move your mouse pointer to the mini-toolbar that appears over your text selection, and then do one of the following:
- To make the text larger, on the Message ribbon menu in the Basic Text group select the Increase font size icon (or press CTRL + SHIFT + >)
- To make the text smaller, on the Message ribbon menu in the Basic Text group select the Decrease font size icon (or press CTRL + SHIFT + <)
To format text in a message: select the text that you want to change, then select the font formatting you prefer in one of the following locations:
- On the Message ribbon menu in the Basic Text group; or
- On the Format Text ribbon menu in the Font group
Note that you can also change the default font style for new messages, replies and forwards, etc.
How do I restore the default font style for my email?
To undo font style changes and restore e-mail font to the default setting (11-point Calibri):
- Select the File ribbon menu. Choose Options from the left-hand menu
- In the Outlook Options window, select Mail from the left-hand menu
- In the Compose messages, select the Stationery and Fonts button
- In the Signatures and Stationery window, select the Personal Stationery tab In the New mail messages section, select the Font… button
- In the Font window, under Font, choose +Body
- Under Font style select Regular
- Under Size, select 11
- Choose the OK buttons to exit this Windows sequence
How do I set-up a mailbox autoreply?
This procedure will enable you to create a rule so that an automatic response is sent from a GD account to all users who write to this address (e.g. to confirm a request for information has been received):
Open Outlook using the GD Mailbox profile, and then:- On the File ribbon menu, select Info from the left-hand menu
- In the Account Information pane, select Manage Rules & Alerts
- In the Rules and Alerts window, select New Rule
- In the Rules Wizard window, under Start from a blank rule select Apply rule on messages I receive. At the bottom of this windows, select Next
- When you are asked Which condition(s) do you want to check? do not select any, just choose Next. You will be notified that This rule will be applied to every message you will receive. Select Yes
- Now you are asked What do you want to do with the message? Add a checkmark next to have server reply using a specific message
- In the bottom section Step 2: Edit the rule description, select the words "a specific message"; this will open a blank e-mail message. This is the reply e-mail that will be automatically sent. Type (or paste) an appropriate subject line and message for this e-mail
- On the e-mail's Message ribbon menu, in the Send group, select Save & Close. The e-mail window will close, and the words "a specific message" are now replaced with the subject line of your automatic reply
- Select the Next button at the bottom
- Now you are asked Are there any exception(s)? Add a checkmark next to except if it is an automatic reply, then select Next
- In the Finish rule setup window, review each value to ensure this is what you intended and modify if necessary. Then select Finish, followed by Apply and OK to close these windows.
How do I determine who is the owner or manager of a GD Account?
Every e-mail distribution list has at least one owner/manager, the employee responsible for overall management of the list. Additional owners may also help manage the list.
To determine the owner or manager of an existing list using Outlook:
- On the Home ribbon menu in the Find group, select Address Book
- In the Address Book window, in the Search field enter the GD account's name
- Right-click the GD account's name in the search results and select Properties
- In the account's properties window, select the Organization tab. The GD account's owner/manager is displayed in the Manager field
To view a complete list of owner(s) or manager(s) of an existing list that you are a member of, you will need to visit the Group Management Portal (GMP):
- On the Group Management Portal home page, in the Member Resources section, select View your memberships (or, if you are an Owner, in the Group Owner Resources section select Manage your groups)
- In the Display Name column, select the name of the list.
- In the Forefront Identity Manager window, select the Owners tab. This tab will indicate all of the list's owners.
How do I manage the membership of a GD account?
Note: To add or remove employees or owners from a GD account, you must first be designated as an Owner of that account.
Using the Group Management Portal, an Owner can modify the membership list of employees or add/remove other owners. Owners can also receive and respond to requests from employees to be added or removed from a list. The Group Management Portal Guide provides instructions for how to Add/Remove Members, Add/Remove Owners, etc.
An employee added to the GD-Full-Rights list can proceed with instructions to Add the GD account to your Outlook (note: they will need to Restart their computer before they can view/access the GD account's mailbox).
Owners of distribution lists can view the membership list in Outlook (read-only):
- In e-mail view, in the left-hand column, right-click on the name of the GD account and select Data File Properties
- In the account's properties window, select the Permissions tab
How do I obtain permission to send e-mail from a GD Account?
To send e-mail from a GD account, you must first be a member of the GD account's Full Rights List. (Ex. GD_Mailbox_Name-FULL-RIGHTS). The Owner of the list can provide you with this right, using the Group Management Portal.
Once you have been added to the GD-Full-Rights list, follow the instructions to Add the GD account to your Outlook. Note that after you have added the mailbox, you will need to Restart your computer before you can access it.
Once you can see the GD account in your Outlook, follow the instructions to Send on behalf of a GD account .
How do I send an email on behalf of a GD account?
If you have Send on Behalf permission for a GD account, then you can do this using the following steps:
- Start a new e-mail message.
- If you do not see the From drop-down selection button immediately above the To… button: in the message window, on the Options ribbon in the Show Fields group, select From to make this button appear.
- Select the From drop-down selection button. All accounts you may send e-mail from should be listed as options. Select the account you wish to send an e-mail from (or if you do not see it listed, select the Other Email Address … option and enter the mailbox name, then choose the From… button)
- The correct account name should now appear next to the From drop-down selection box. You may now complete your message and select Send to have it sent from this account.
The recipient of your e-mail will see the GD account's name as its sender. However, when they open the e-mail they will also see your name identified. If you prefer to send e-mail from the GD account without your name being included, you must submit an online request to the National Service Desk for assistance (note: you can identify "To attention of Access and Capacity Management" in your request's description to ensure it is properly directed).
How do I open Outlook as another user, e.g. as a GD account (multiple profiles)?
You can establish multiple profile options to choose from when you open Outlook, so that you can open Outlook as yourself to view your own mail and calendar, or open it under another account (e.g. a GD account).
- In the Windows Start menu, select Control Panel
- In the View By dropdown menu (top right) where it says Category, change this to Large icons to see the full list of options
- From the full list of options, select Mail (32-bit)
- In the Mail Setup window, select the Show Profiles… button
- In the Mail window:
- Take note of / write down the current selection for Always use this profile (e.g. "Default Outlook Profile"); this is the profile that you use to access your own account and e-mail.
- Select the Add.., button. In the New Profile window, enter a name of your choice that will help you to distinguish the new mailbox, then select OK.
- In the Add Account window:
- Paste or type the GD email address into the E-mail Address field. This will activate the Your Name field above it.
- Paste or type the name of the GD account as you would like it to appear on the From/To line of e-mail into the Your Name field.
- Leave the Password and Retype Password fields blank (you do not need a password if you are a member of the GDs full-rights access group).
- Then select the Next button.
- Outlook will complete the setup of the GD account profile. Once finished, you should see a "Congratulations!" message at the top of the window and three green checkmarks. Select the Finish button to close this window.
- Also in the Mail window: under When starting Microsoft Outlook, use this profile, select the option Prompt for a profile to be used. Then select the OK button to close this window.
- Close Outlook, and re-open to test these changes. Outlook should now prompt you to choose a mail profile. To open the GD mailbox, select it from the drop-down menu and then choose OK. To go back to your own mailbox: close and reopen Outlook, and instead select the default profile name that you noted in Step 5a.
How do I remove a GD account from my Outlook?
Use the following instructions when a GC account continues to appear in your Outlook folder list and you no longer need to access it:
- In the main Outlook window, select the File menu and choose Info from the left-hand menu, then select Account Settings and Account Settings…
- In the Account Settings window, select the E-Mail tab and choose Change …
- In the Change Account window, select the More Settings … button
- In the Microsoft Exchange window, select the Advanced tab
- Select the name of the GD account you want to remove, then choose the Remove button to remove it from the list
- Select the OK buttons to close this windows series. The change will take effect the next time you Restart your computer