Office 365 – FAQ
Using Office 365
How do I log in to my Office 365 account?
- Open Microsoft Edge and visit office.com. Please note that if you are using a personal device, you must do this through your AppGate or Secure Access Virtual Environment – Desktop (SAVE-D) connection to the ESDC network.
- If you are not logged in automatically, enter the same username and password that you use to access the ESDC network.
How do I acquire an Office 365 License?
You can request a license via the Office 365 License Request form.
What applications in Office 365 can I use?
Employees can use the following Office 365 applications:
- Word
- Excel
- PowerPoint
- Outlook
- OneDrive
- OneNote
- SharePoint
- Teams
The National Service Desk (NSD) only offers technical support for Teams at the moment. Employees can access any of the other O365 applications available to them; however, technical support will be limited. If you need any non-technical assistance, you can connect with the Office 365 Community of Practice Super Users by asking a question in the Office 365 Help team.
I have received emails that are from Microsoft; are they real?
Office 365 will sometimes generate automated emails that ESDC cannot filter or block. The good news is that this email may provide you with helpful information that can benefit you.
There is one caution: someone in future could (hypothetically) send you phishing and spam email disguised as one of these messages. Microsoft will never use one of these emails to ask you to confirm your password, or to request any other personal information or information about your employer.
A message is inviting me to download the Teams application. Can I do that?
You may download and install the Teams application on your computer. Based on your experience, you will determine whether it provides you with improved performance. Visit the Getting Started & Learning page for short instructions on downloading and installing the Teams application. If you experience issues, technical support is available by submitting an online request with the National Service Desk.
Why am I required to verify my credentials using multi-factor authentication when connecting to Office 365 applications?
Connecting to our department's network requires additional verification to safeguard our information. Microsoft's multi-factor authentication adds an extra layer of protection that is required to access Office 365 applications. This creates a safe and secured workspace for employees.
Where can I learn about accessibility in Office 365 to make sure content is accessible to everyone?
Visit the Government of Canada's Office 365 and Accessibility page on GCwiki.
Can I use Office 365 web applications (e.g., Outlook 365, Word Online, Excel Online, PowerPoint Online, OneNote Online) in the same way I currently use the Office 2016 desktop applications?
The Office desktop applications will default to working with each other. In contrast, Office 365 web applications will default to working with other online applications.
For example:
- Opening a Word document attachment using Outlook 2016. In that case, it will use the Word 2016 desktop application to open it.
- Opening a Word document attachment using Outlook 365. In that case, it will use the Word Online web application to open it.
Note: The National Service Desk does not yet support any O365 applications other than Microsoft Teams.
Does Office 365 have access to the same files as Microsoft Office on my computer?
Both the web (Office 365) and desktop applications (Office 2016) can access files, regardless of the default repository.
While using Office 365 web applications, such as Word Online, the documents that are created will be saved to your OneDrive account by default. If you prefer another repository, you can save the file elsewhere.
What options are available to help me preserve the contents of my cloud (office.com) mailbox?
If you believe that there are items of business value currently being stored in your cloud mailbox, below are some helpful suggestions that may assist you in preserving that content:
From your cloud mailbox (office.com):
- Email text: You may manually copy content from an email into a separate document (e.g., Word, Excel, or OneNote 2016) and save the file to a central repository such as SharePoint 2010 or a network drive. (The best option if you are preserving a small number of emails.)
- Attachments: You may open an attachment and save it to a central repository such as SharePoint 2010 or a network drive. (The best option if you are preserving a small number of attachments.)
- A third option is useful if you have numerous emails of business value. This option will automatically save the text of the email, its attachments and keep both the email and attachments in one location. For this method, you will need to create a OneNote notebook:
-
Access Office 365 (Office.com).
- Select the
 OneNote icon located along the left side.
 - Select
 + New notebook located near the top.
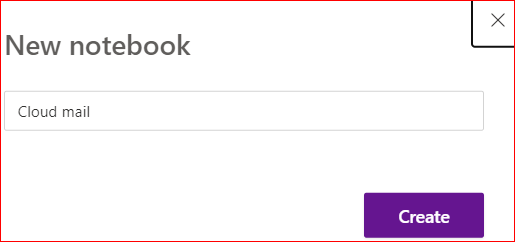
 -
Type a name for the new notebook, and select Create.
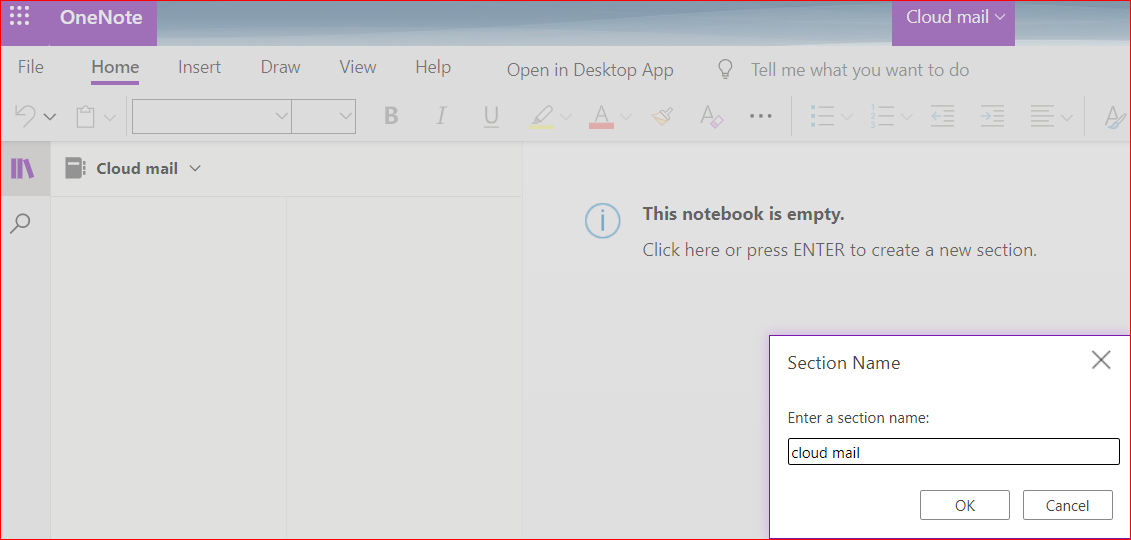
-
When the new notebook appears, press ENTER to create a new section, type a section name, and then select OK.
- Close OneNote.
- Go to Office 365 (Office.com) again and select the
 Outlook icon along the left side.
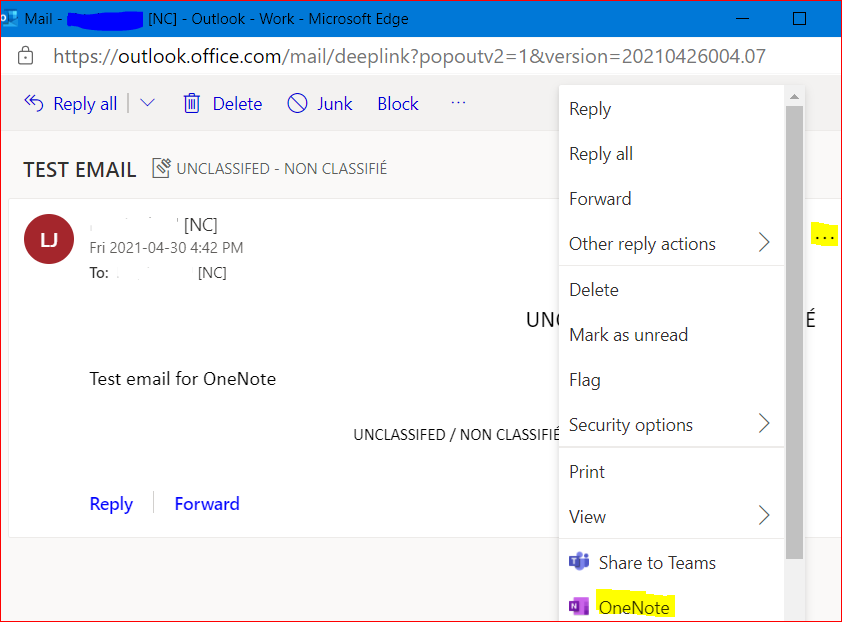
 -
Open an email that you wish to preserve, select the three dots (. . .) on the right side, and then select OneNote.
-
Select the name of the notebook (and section) you created previously, select SAVE and then select Open in OneNote.
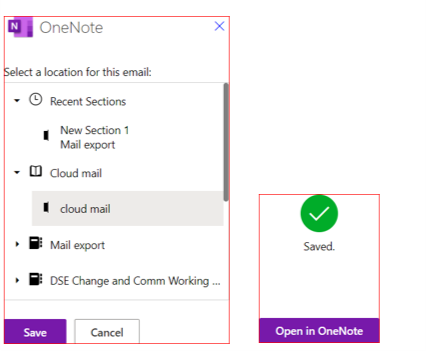
-
The email will appear in the previously created notebook:
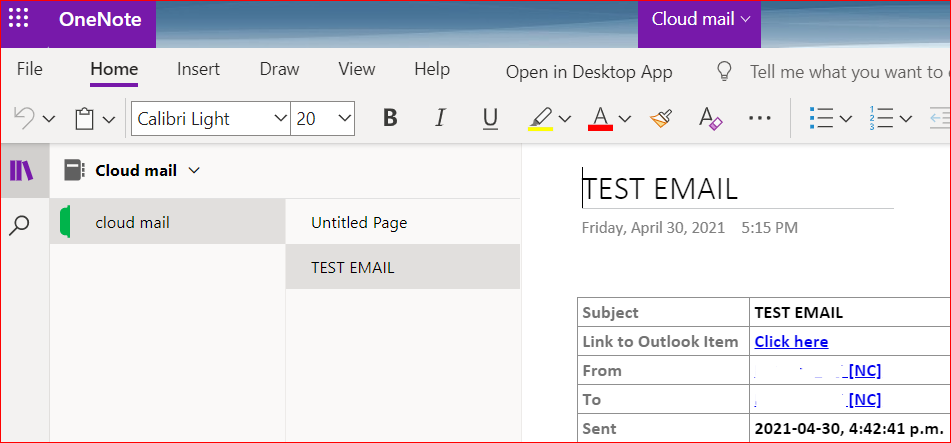
- Close OneNote.
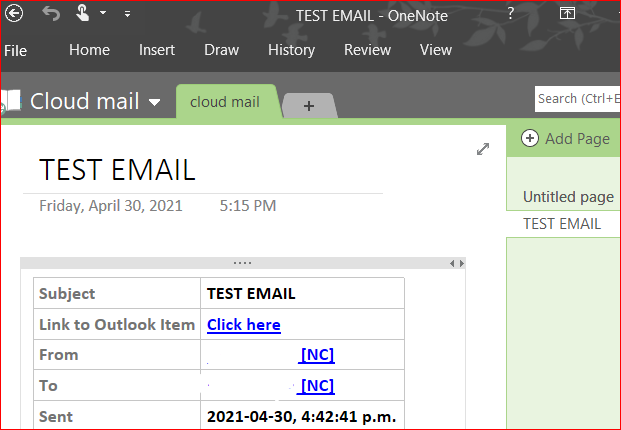
- From your Windows desktop, select Start > Microsoft Office 2016 > OneNote 2016.
-
Within OneNote 2016, select File > Open and then select the previously created notebook, from the Open from other locations > OneDrive.
(Please be patient, this may take some time.)
- You may repeat steps 7-10 for each email stored in your cloud mailbox that you wish to preserve. The creation of the OneNote notebook (steps 2-5) is only required once.
-
Change language preference for Office365 on Peoplesoft
These instructions will allow you to change your language preference for all Office 365 apps. Please note that the change may take up to 24 hours to apply to your Office 365 environment.
Si votre préférence linguistique est le français, consultez ces mêmes instructions en français.
- Login to Peoplesoft using your ESDC credentials.
- On the main PeopleSoft page, select the "Personal Details" title on the bottom row.

- On the left side menu, select the last option "Language Preferences".

- On the Language Preferences page, select the first setting "Preferred Software Language".

- From the "Language Code" drop-down menu, select the desired language.

- Save any changes by selecting the Save button
Sharing files in Office 365
The files you store in Office 365 are available to everyone with permissions to that space (OneDrive or SharePoint Online). Still, you may want to share specific files with people who do not otherwise have access to the repository. Here is how to share file links in Office 365!
Step 1 – Create a link to your file
Desktop Applications (PowerPoint, Excel, Word)

While editing a file in a desktop application, select the Share icon in the top right to open limited sharing options (like the "Specific People" option below).
OneDrive, SharePoint and browser applications

Select the file you want to share and then select the share icon in the top menu, next to the filename, or select the ellipsis for more options. In a browser application, select the share icon at the top right.
File Explorer

Select a document hosted in Office 365 and then select Share from the options.
Note: This option requires OneDrive for desktop.
Step 2 – Select your link settings
Select "People you specify can view" to see your link settings using the default sharing window. Setting sharing options are as easy as:
Choosing your recipients or audience:
- People in Employment and Social Development Canada (ESDC) with the link – gives anyone in ESDC who has the link access to the file, whether they receive it directly from you or forwarded from someone else.
- People with existing access – can be used by people who already have access to the document or folder. Use this if you want to send a link to somebody who already has access.
- Specific People – gives access only to the people you specify, although others may already have access. If people forward the sharing invitation, only people who already have access to the item will be able to use the link.
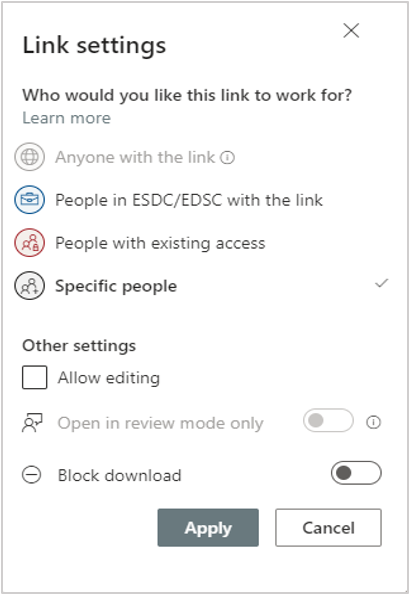
Managing how they interact with your file:
- Allow editing – Off by default for "People in ESDC" and "Specific People." Checking the box allows recipients to edit your document. If you only want people to view your files, uncheck the box.
- Block download – Turn on this option to limit transitory copies of a shared document.