Digital Signatures — How to Guide
How do I add my digital signature?
The following procedures are to help employees and managers on creating a document for signature and/or signing a document, excel file or presentation.
These instructions should be incorporated into your current business processes regarding the use of digital and electronic signatures.
Always remember to save the final signed version of a document to your branch/region's central repository (e.g., SharePoint, network drive).
 How do I get started?
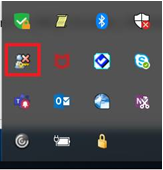
 All applications use the Entrust Signature certificates to execute or assign a digital signature to a document. Before being able to add/create a digital signature(s), you will need to log into your Entrust Profile using your myKEY credentials. From the system tray (in the taskbar):
- Press Shift + F10 to open the shortcut menu (with a mouse, you can right click) on the Entrust icon and Select Log In
The Entrust Security Store Login screen will appear
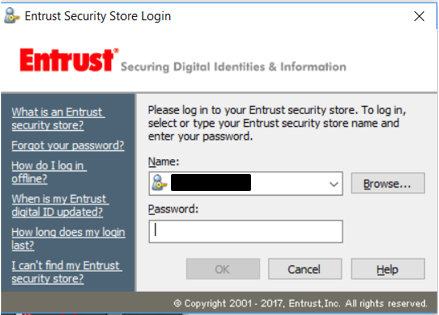
- Select the Browse button
- Navigate to where you have stored your myKEY (.epf file) on the network
- Select Open
This will fill in the name field in the Entrust Intelligence Security Provider box - Enter your myKEY password (the same as you use to access Compensation Web Applications) and Select OK
For more information, consult the myKey page on iService.
- Press Shift + F10 to open the shortcut menu (with a mouse, you can right click) on the Entrust icon and Select Log In
 How do I sign a document shared within MS Teams?
 Signing a Microsoft document (Word, Excel, PowerPoint)
- Launch MS Teams
- Open the document received via a team channel or chat in the Desktop App
- Ensure that you are the only author modifying the document (you will not be able to sign it if the document is being co-authored)
-
Follow the steps provided within this guide for the different types of Microsoft applications
- For multiple signatures, close the document to allow others to sign
- Once signed, save in your branch / region’s central repository (e.g., SharePoint, network drive) and follow the instructions in the original tasking or follow your internal business processes.
Signing a PDF file
-
Download or save the PDF file
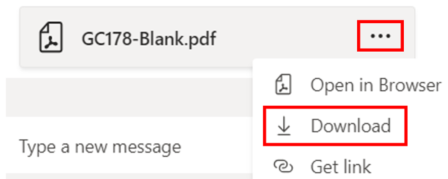
or

- Follow the steps outlined in the section How do I sign a PDF file
- Once signed, save in your branch / region’s central repository (e.g., SharePoint, network drive) and follow the instructions in the original tasking or follow your internal business processes.
 How do I sign an email in Outlook?
 - Launch Outlook
- Open a new email message
- Select the "Message" tab and Select the Sign icon

The Sign icon will appear a little darker, confirming that the digital signature process has been invoked
-
Select Send to send your message to the recipient
Your digital signature (Entrust Digital Signature) will be included within the email.
 How do I sign a PDF file?
There are two types of PDF files available for signature at ESDC. Those that are digitally enabled and those that are not.
A file that is not digitally enabled was created with the intent of obtaining "wet signatures" but can still be signed with a digital signature by following the steps below.
A file that is digitally enabled was created with the intent of obtaining a digital signature which links to your Entrust profile using your myKey credentials.
Although Foxit PhantomPDF can be used to apply and validate digital signatures, it is better to use Adobe Acrobat Reader. Unlike Foxit PhantomPDF, Adobe Acrobat Reader:
- Works seamlessly with our default Entrust certificate file type (.epf);
- Requires only an Entrust login to apply a signature;
- Automatically identifies valid and invalid signatures;
- Automatically identifies documents that were changed after a valid signature was applied;
- Makes signing documents faster because many ESDC forms include a compatible selectable signature line; and is on all Windows devices within ESDC.
If you have any questions, contact the National Service Desk.
Signing a digitally enabled PDF file
A digitally enabled file already has a selectable signature line as shown below:
- Open the PDF file
- Once ready to sign, select the signature line

-
The Sign with a Digital ID dialogue box will appear
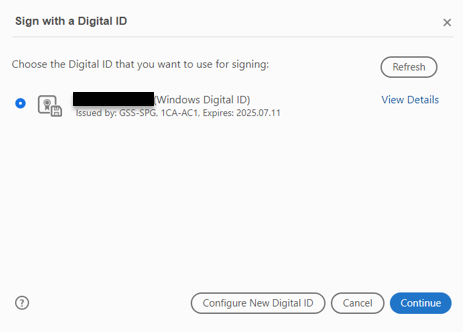
Select the identification under your name and select Continue
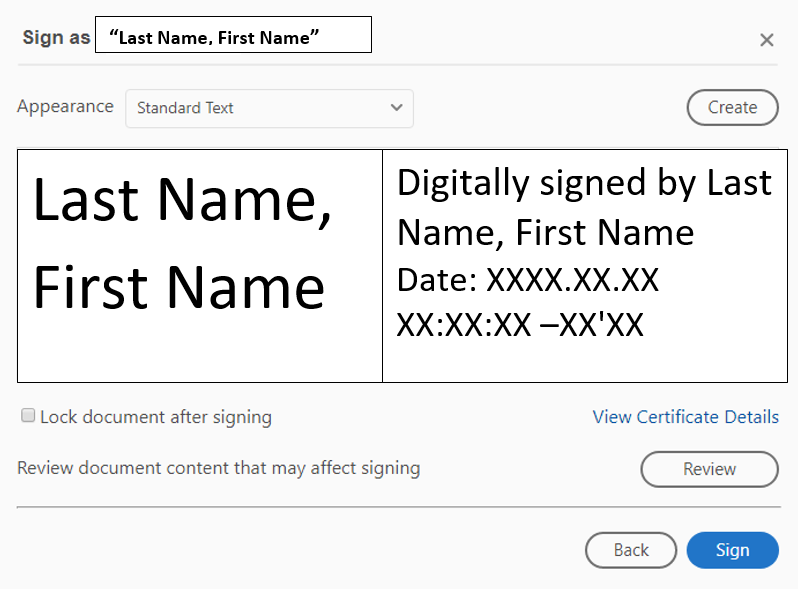
- Select Sign on the Sign as "your name" dialog box
- Once signed, save in your branch / region's central repository (e.g., SharePoint, network drive) and follow the instructions in the original tasking or follow your internal business processes.
Signing a non-digitally enabled PDF file
- Open the document
- Complete all relevant fields
- Select on Tools
- Select on Certificates
- Select on Digitally Sign

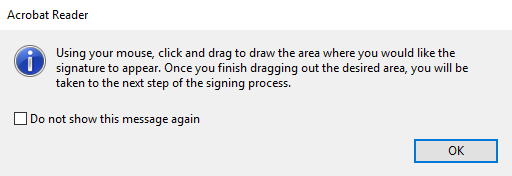
- Select OK on the dialog box then following its instructions, select and drag to draw the area where you would like the signature to appear
- The Sign with a Digital ID dialogue box will appear
Select the identification under your name and Select Continue
- Select Sign on the Sign as "your name" dialog box
- It is recommended that you do not check the box Lock document after signing unless you have been specifically instructed to do so (when in doubt, leave it unlocked)
- Select Sign
- A Save as dialog box will open asking you to save your signed document
- Once signed, save in your branch / region's central repository (e.g., SharePoint, network drive) and follow the instructions in the original tasking or follow your internal business processes.
In order to be able to add multiple signatures within the PDF document and prevent further editing, follow steps 14 to19 to apply print to PDF settings.
Note that if you are following the steps outlined below, any signatures added will render the originator’s signature as invalid. - Open the document
- Select File in the upper left tabs
- Select Print
- Select Microsoft Print to PDF and select Print

- A save as windows will open allowing you to save the PDF file to the network drive (e.g., F:/drive)
- Once saved, re-open the newly created PDF file to add your digital signature
- Once signed, select save and send back to the requestor
Validating a digital signature certificate in a PDF file
- Select the signature and Press Shift + F10 to open the shortcut menu (with a mouse, you can right click) on the signature and select Validate Signature
A Signature Validation Status box will appear
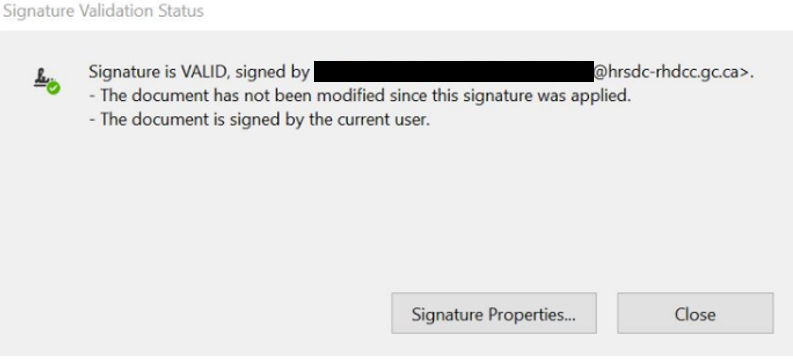
- Select Signature Properties
- Select Show Signer's Certificate to validate. This will show if the signer has a valid certificate and when it expires.
Validating digital signatures in a PDF file
- Verify that this message appears at the top of a digitally signed document. It means that the signature(s) have been verified against the certificate store and are valid. No further checks are needed.

- If the following message appears "Signed and all signatures are valid. Document was updated after signing" appears; continue on to Step #2.

- To view signature details open the signature panel.
- To open the signature panel, select the icon on the left side of the PDF file
 or select the Signature Panel at the top of the page
  .
.
- To open the signature panel, select the icon on the left side of the PDF file
- When you select the Signature Panel icon, the system will display a side panel:
- To see the changes made:
- Select the Signature Panel icon to verify if the signature is valid.
- View the original version prior to the amendments by choosing "Click to view this version".
Long description
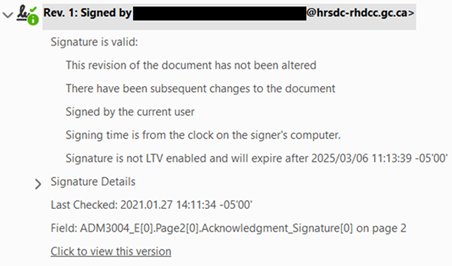
Signature is Valid:
This revision of the document has not been altered
There have been subsequent changes to the document
Signed by the current user
Signing time is from the clock on the signer's computer.
Signatures is not LTV enabled and will expired after 2025/03/06 11:13:39- 05'00'
Signature Details
Last Checked: 2021.02.27 14:11:34-05'00'
Field: ADM3004_E[0].Acknowledgment¬_Signature[0] on page 2
Click to view this version
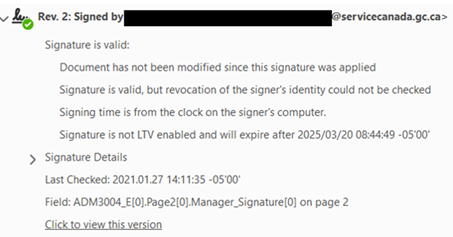
Long description
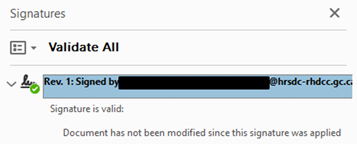
Signature is valid:
Document has not been modified since this signature was applied
Signature is valid, but revocation of the signer's identity could not be checked
Signing time is from the signer's computer.
Signautre is not LTV enabled and will expire after 2025/03/20 8:44:49¬-05'00'
Signature Details
Last Check: 2021.01.27 14:11:35-05'00'
Field: ADM304_E(0).Page2[0].Manager_Signature[0] on page 2
Click to view this version
- Verify that this message appears at the top of a digitally signed document. It means that the signature(s) have been verified against the certificate store and are valid. No further checks are needed.
 How do I sign a Microsoft Word document?
 There are three options to digitally sign a Word document.
- Signing a Word document created with a signature (s) block
- Exporting to PDF to digitally sign a Word document
- Adding a digital signature directly in the Word document
Before you can add your digital signature to a word document, the creator of the document will need to create a signature line.
Create a document for signature
- Open the document requiring digital signature
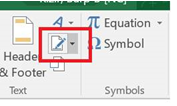
- Move your cursor to where you want to add a signature line
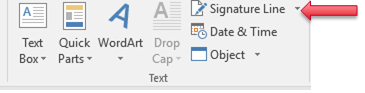
- Select the Insert tab to display all of the options in the tab
- Select Signature Line dropdown list, and select Microsoft Office Signature Line

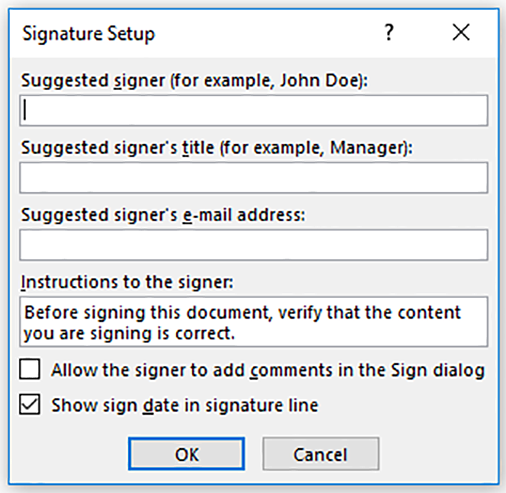
The Signature Setup screen will appear

- Enter the following information:
- Suggested signer
- Suggested signer's title
- Suggested signer's e-mail address
- Instructions to the signer
- Choose one or both of the following options according to the document's requirements:
- Allow the signer to add comments in the Sign dialog box
- Show sign date in signature line
- Select OK
Repeat steps 1 through 7 to insert additional signature lines - Send the document to the signer following your internal business processes for documents requiring a signature (s)
Signing a Microsoft Word document
As the signer of the document:
- Open the document
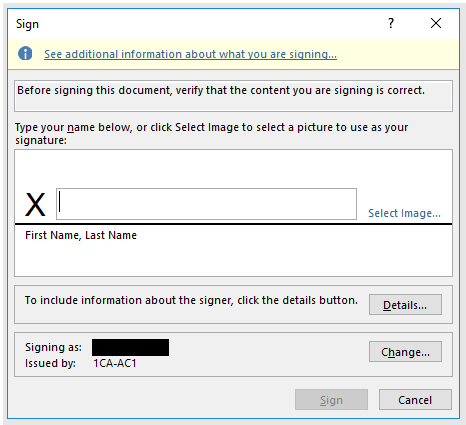
- Select the signature box and press Shift + F10 to open the shortcut menu (or double click on the signature line) and key your name or select an image of your signature you have saved
- Select Sign

- Once signed, save in your branch / region's central repository (e.g., SharePoint, network drive) and follow the instructions in the original tasking or follow your internal business processes
Signing a Microsoft Word document containing multiple signatures
Upon receipt of the document for signature via email:
- Save in your branch / region's central repository (e.g., SharePoint, network drive) – note that this is the only option for allowing you to sign a document with multiple signatures
- Follow steps 1 to 3 in the section Signing a Microsoft Word document
Validating a digital signature in Microsoft Word
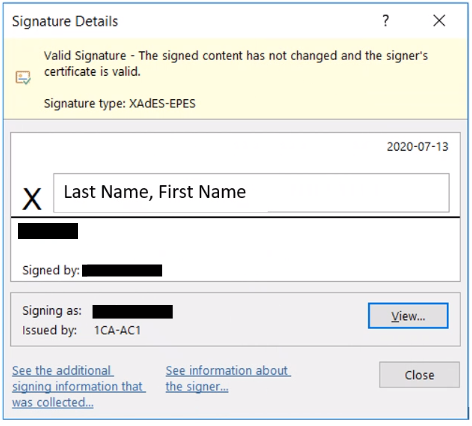
Within the Word document:
Select the signature box and press Shift + F10 to open the shortcut menu (or double click on the signature box) that contains the originators signature. The following screen should appear if the signature is valid.
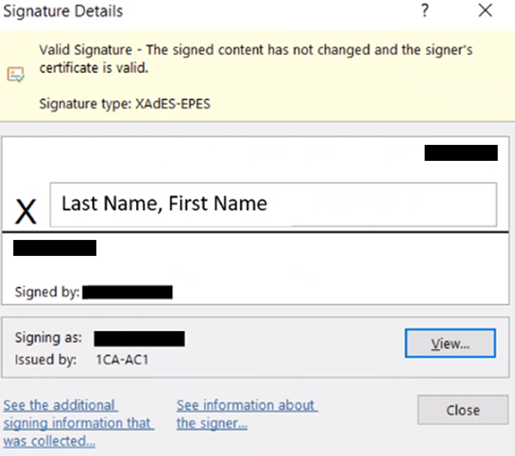
If the signature cannot be validated, confirm with the signer.
Exporting to PDF to digitally sign a Word document
With your Word document open:
- Select File
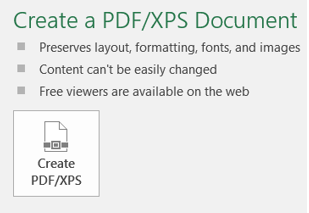
- Select Export
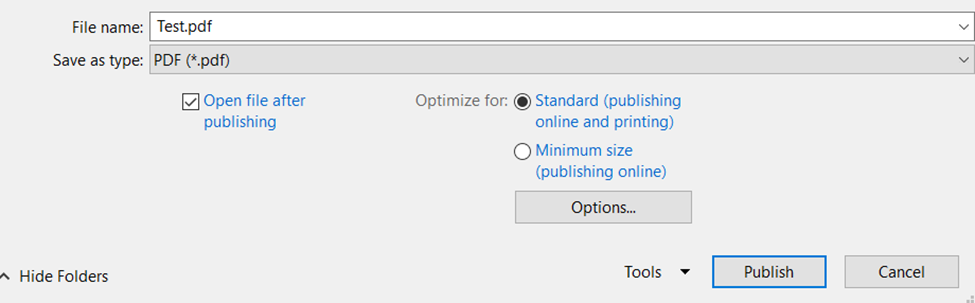
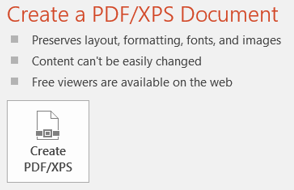
- Select Create a PDF/XPS Document
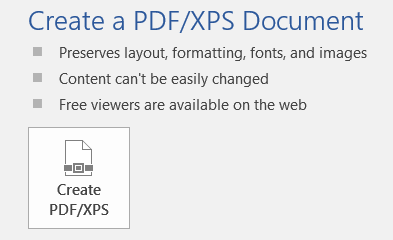
A save screen will appear. Save to a network drive (e.g., F:/drive)
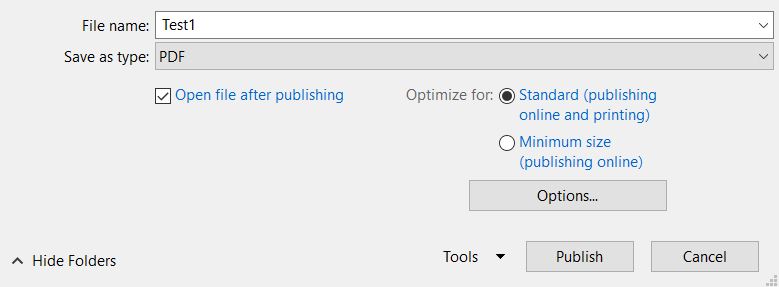
- Select Publish
The file will has now been saved as a PDF. Complete steps 9 through 18 of the Signing non-digitally enabled PDF files section to complete the signature process for the document in question.
Adding a digital signature directly in a Word document
With your Word document open:
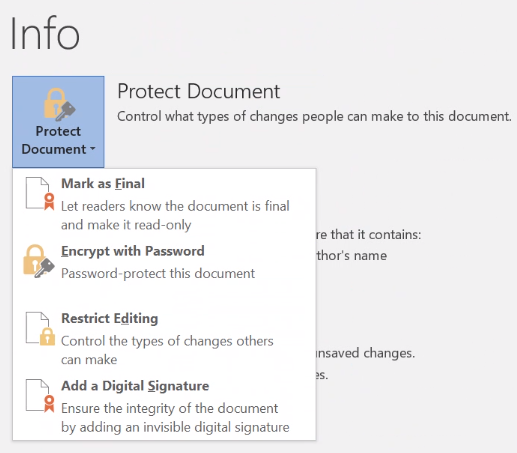
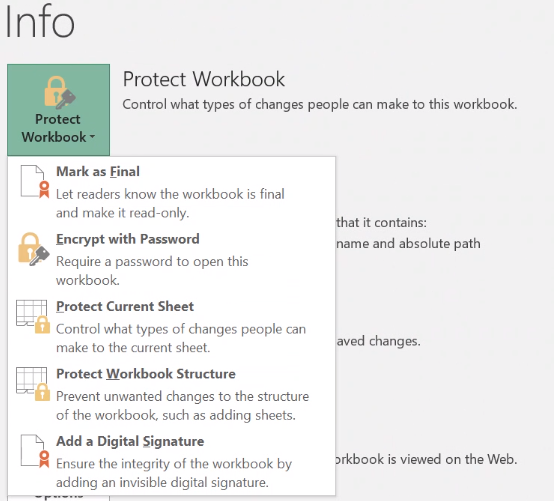
- Select File
- Select Protect Document
- Select Add a Digital Signature
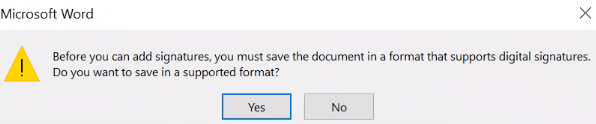
If you are saving the document for the first time, the following warning message will appear. Select Yes and save the document to your central repository to continue.
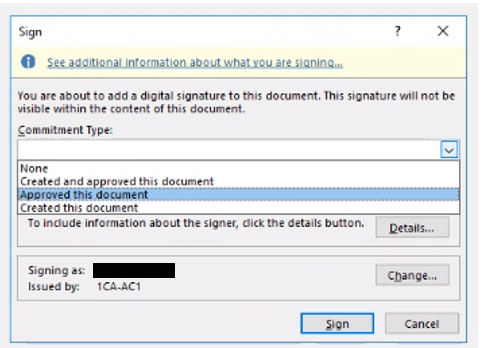
The Sign screen will appear
- From the Commitment Type dropdown, select Approve this Document

- Select Sign
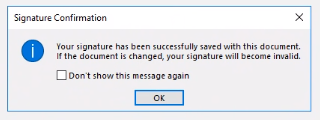
The signature confirmation box will appear. - Select OK

- Once signed, save in your branch / region's central repository (e.g., SharePoint, network drive) and follow the instructions in the original tasking or follow your internal business processes
Upon receipt of the document for signature via email
- Select the document within your email and then press Shift + F10 to open the shortcut menu (with a mouse, you can right click the document) select Save As to download
- Save in your branch / region's central repository (e.g., SharePoint, network drive) – note that this is the only option for allowing you to sign a document with multiple signatures
- Follow steps 1 to 3 in the section Signing a Microsoft Word document
 How do I sign a Microsoft Excel file?
There are three options to digitally sign an Excel file
- Signing an Excel file created with a signature (s) block
- Exporting to PDF to digitally sign an Excel file
- Adding a digital signature directly in the Excel file
Before you can add your digital signature, the creator of the excel file will need to create a signature line.
Creating a Microsoft Excel file for signature
- Open the Excel file requiring digital signature
- Move your cursor to where you want to add a signature line within the sheet
- Select the Insert tab to display all of the options in the tab
- Select the Signature Line dropdown list, and select Microsoft Office Signature Line

The Signature Setup screen will appear
-
Enter the following information:
- Suggested signer
- Suggested signer's title
- Suggested signer's e-mail address
- Instructions to the signer
- Check one or both of the following options according to the document's requirements:
- Allow the signer to add comments in the Sign dialog box
- Show sign date in signature line
- Select OK
Repeat steps 2 through 7 to insert additional signature lines.
- Send document to the signer
- Send document to the signer following your internal business processes for documents requiring a signature (s)
Signing a Microsoft Excel file
As the signer of the file:
- Open the file. Do Not select Edit Anyway function
- Select the signature box and press Shift + F10 to open the shortcut menu (or double click on the signature box) and key your name or select an image of your signature you have saved and Select Sign
Once you select sign, the following dialogue box will appear
- Select OK to continue
- Once signed, save in your branch / region's central repository (e.g., SharePoint, network drive) and follow the instructions in the original tasking or follow your internal business processes
Signing a Microsoft Excel document containing multiple signatures
Upon receipt of the file for signature, follow steps 1 to 3 in the section Signing a Microsoft Excel file
Validating a digital signature in Microsoft Excel
Within the Excel spreadsheet:
- Select the signature box and press Shift + F10 to open the shortcut menu (or double click on the signature box) that contains the originators signature The following screen should appear if the signature is valid
If the signature cannot be validated, confirm with the signer
- Select the signature box and press Shift + F10 to open the shortcut menu (or double click on the signature box) that contains the originators signature The following screen should appear if the signature is valid
Exporting to PDF to digitally sign an Excel file
With your Excel document open:
- Select File
- Select Export
- Select Create a PDF/XPS Document
- Save as a PDF file
- Save to a network drive (e.g., F:/drive)
- Select Publish
The file will has now been saved as a PDF. Complete steps 9 through 18 of the Signing a non-digitally enable PDF file to complete the signature process for the document in question.
Adding a digital signature directly in an Excel file
With your Excel file open:
- Select File
- Select Protect Document
- Select Add a Digital Signature
If you are saving the document for the first time, the following warning message will appear. Select Yes and save the document to your central repository to continue.
The Sign screen will appear.
- From the Commitment Type dropdown, select Approve this Document
- Select Sign.
The signature confirmation box will appear - Select OK
- Once signed, save in your branch / region's central repository (e.g., SharePoint, network drive) and follow the instructions in the original tasking or follow your internal business processes
 How do I sign a Microsoft PowerPoint presentation?
PowerPoint only allows you to digitally sign the document itself – you cannot create a digital signature line directly in the PowerPoint presentation
There are two options to digitally sign a PowerPoint presentation.
- Adding a digital signature directly in the PowerPoint presentation
- Exporting to PDF to digitally sign a PowerPoint presentation
Adding a digital signature directly in a PowerPoint presentation
With your PowerPoint presentation open:
- Select File
The Info screen will appear - Select the Protect Presentation
- Select Add a Digital Signature
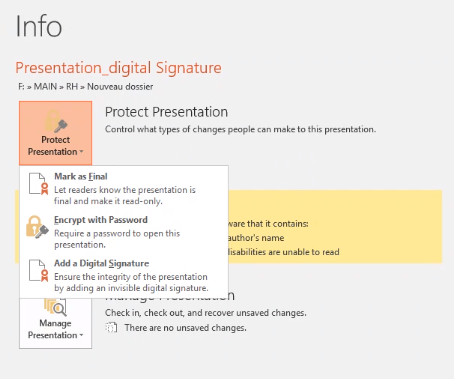
If you are saving the document for the first time, the following warning message will appear. Select Yes and save the document to your central repository to continue

The Sign screen will appear
- From the Commitment Type dropdown, select Approve this Document

- Select Sign.
The signature confirmation box will appear - Select OK
- Once signed, save in your branch / region's central repository (e.g., SharePoint, network drive) and follow the instructions in the original tasking or follow your internal business processes
- Select File
Exporting to PDF to digitally sign a PowerPoint presentation
With your PowerPoint presentation open:
- Select File
- Select Export
- Select Create a PDF/XPS Document
A save screen will appear. Save to a network drive (e.g., F:/drive)

- Select Publish
The file will has now been saved as a PDF. Complete steps 9 through 18 of the Signing non-digitally enabled PDF files to complete the signature process for the document in question.
 How do I add a digital signature using File Explorer?
You can digitally sign and encrypt any document while preserving its format (PowerPoint, Excel, Word, etc.) using file explorer.
- Open File Explorer
- Locate the file that needs encryption or digital signature
- Press Shift + F10 to open the shortcut menu (with a mouse, you can right click) on the file and select the appropriate action:
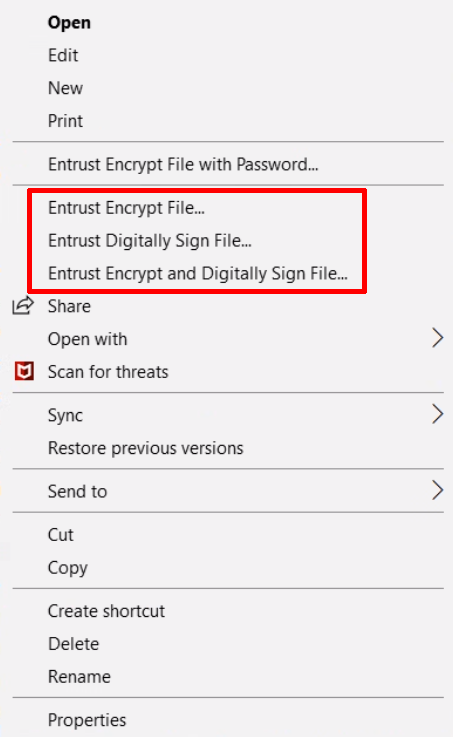
A window will appear guiding you through the next steps
The digitally signed file should now appear like the following example in File Explorer

- Once signed, save in your branch / region's central repository (e.g., SharePoint, network drive) and follow the instructions in the original tasking or follow your internal business processes
- Open File Explorer
Need help? Contact the National Service Desk (NSD) or contact your Branch/Region IM Lead/Broker for IM advice and guidance.