Encrypted USB(eUSB) Devices Initializing Your Device
Introduction
Introduction
In order to begin using your Encrypted USB device (eUSB), Biometrics or Password protected, you will need to follow specific steps to activate and associate the eUSB device to your work login account. This process ensures the ability of IT Security Services to support your device should access problems arise (i.e. forgotten password etc…). It also allows security software updates to be uploaded to your eUSB device.
What you need to know:
When you plug in your eUSB device, the first initialization screen may take a while to load. The entire process will take approximately 15 minutes. DO NOT remove the eUSB device until the process is completed or the device may become damaged and unusable.
- For additional troubleshooting information, please refer to the eUSB Troubleshooting Guide.
Important note for Employees using a Surface Pro Tablet & Windows 10
Important note for Employees using a Surface Pro Tablet & Windows 10
Employees using a Windows 10 device should NOT initialize their eUSB device on their tablet or device due to version incompatibilities. You must log in to a Windows 7 ESDC department-issued laptop or desktop connected to our network. Once logged in, plug in your eUSB device and follow the personalization instructions listed below.
Initializing Encrypted Hard Drive Devices
Initializing Encrypted Hard Drive Devices
Employees initializing an Encrypted Hard Drive Device should follow steps 1 to 3 listed below under the Personalization process. You then need submit an online service request to the National Service Desk before you attempt to save any data to the eUSB drive.
Personalization Process
Personalization Process
Step 1: Initialization
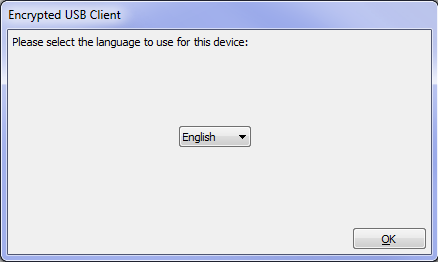
Once you plug in your eUSB device, the process will begin with the eUSB device communicating with the server to ensure it is up to date and launch the Encrypted USB Client configuration: Select the language and click ‘Ok’ to continue.
- If the Encrypted USB Client window does not get displayed after 5 minutes or if an Administrative Password Request window opens, a reinstall of the eUSB client is required. Please refer to the “Encrypted USB Device Troubleshooting Guide”.
Alert: Please STOP initializing the key if:
- The above Encrypted USB Client Language Request window does NOT open. And/or
- An Administrative Password Request window opens instead of the Encrypted USB Client Language request window.
A reinstall of the eUSB client is needed. You need to submit an online service request to the National Service Desk. For more details please refer to the “Encrypted USB Device Troubleshooting Guide”.
If the above Encrypted USB Client Language request window opens: Select the language and click ‘Ok’ to continue. The server will provide updates to the device:
Step 2: Personalization
This process involves setting your access to the device. Once the initialization process is complete you will be presented with the following screen:
Click “Next”.
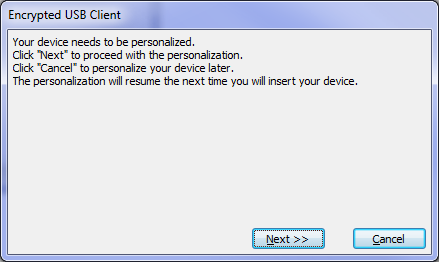
Click “OK” to continue.
Step 3: Setting a Password/Biometric ID
Important Notes:
- There are two types of Encrypted USB devices, a password version (type 1) and a biometric version (type 2). Please follow the instructions according to the device you have.
- At the end of this step, you will be prompted to login to your device: refer to section “Logging Into Your eUSB Device”.
TYPE 1 - Password Devices
Password eUSB devices require you to create a password. Remember, your device is only as strong as it’s password. Using a stronger password for this eUSB device will enhance the security of your device. Follow the Strong Password Standard: Your password needs to be 8 characters’ minimum, including at least one of each: upper and lower case letters, a number and a symbol. Please note that your password expires after 90 days.

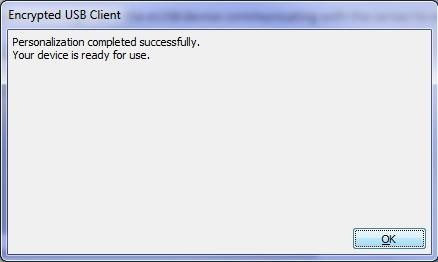
Once the password creation process is complete, the following window will get displayed to confirm the successful personalization of your device.
As soon as the password registration is complete, you will be automatically prompted to authenticate (logon) to your eUSB device. Enter the password you just created.
Note: If the above window does not open automatically, do the following:
- Click on Windows start icon
 ,
, - Click on Computer
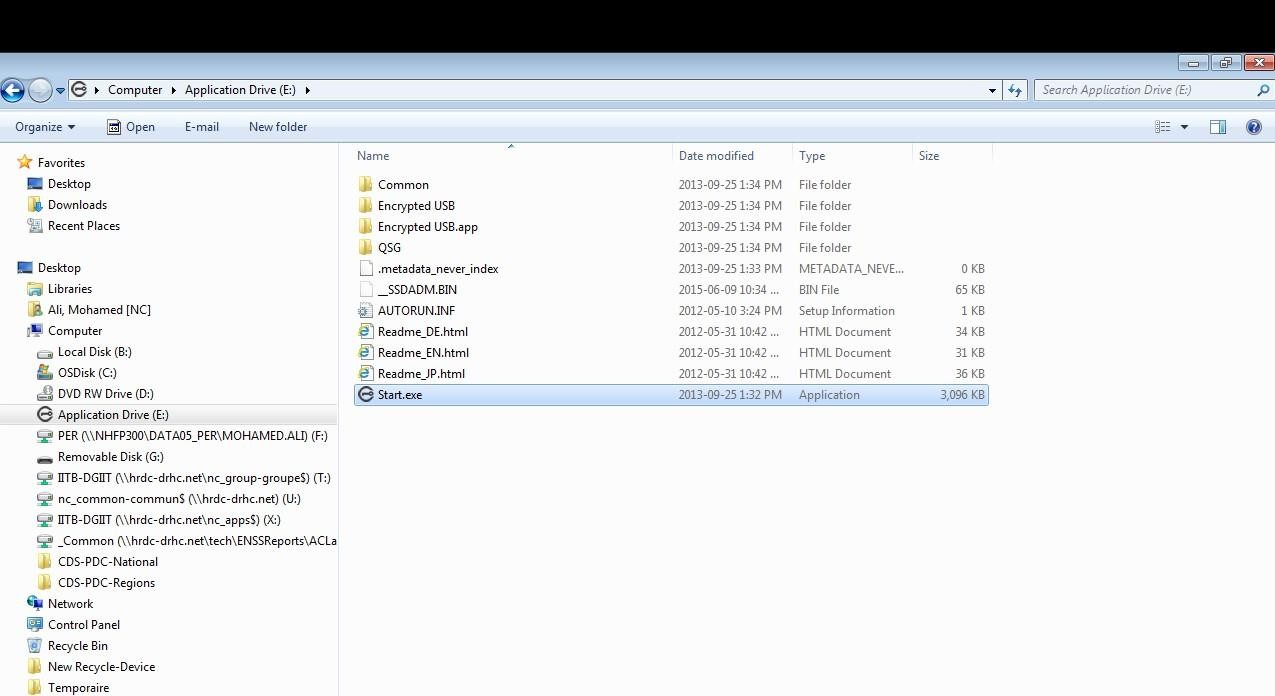
- Locate and click the
 Application Drive on the left side of the panel
 - Double click on the Start (Start.exe) icon on the right side of the panel.
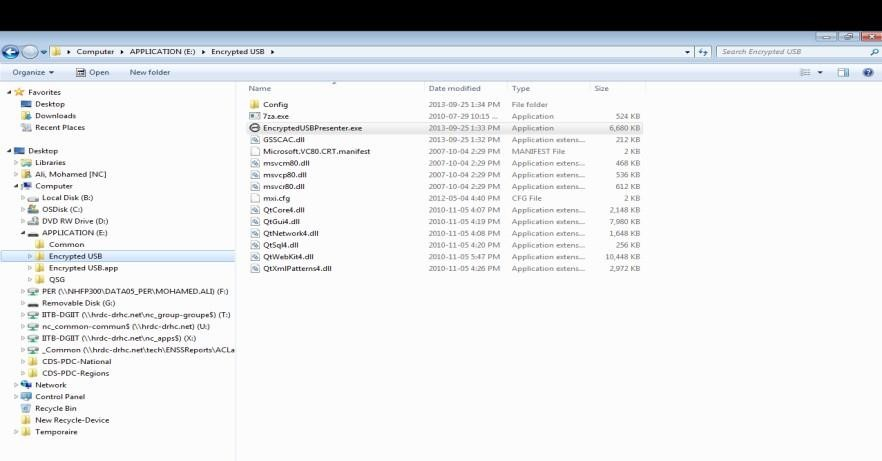
- Wait a few seconds and if password prompt still does not appear, then open the “Encrypted USB folder”
- Double click on the “EncryptedUSBPresenter.exe” file. This should force password window to open.
Step 1 & 2
Step 3
If the window still does not launch, please submit a ticket request with the National Service Desk.
Refer to section “Logging Out and safely removing your eUSB device” to properly logoff and eject your device.
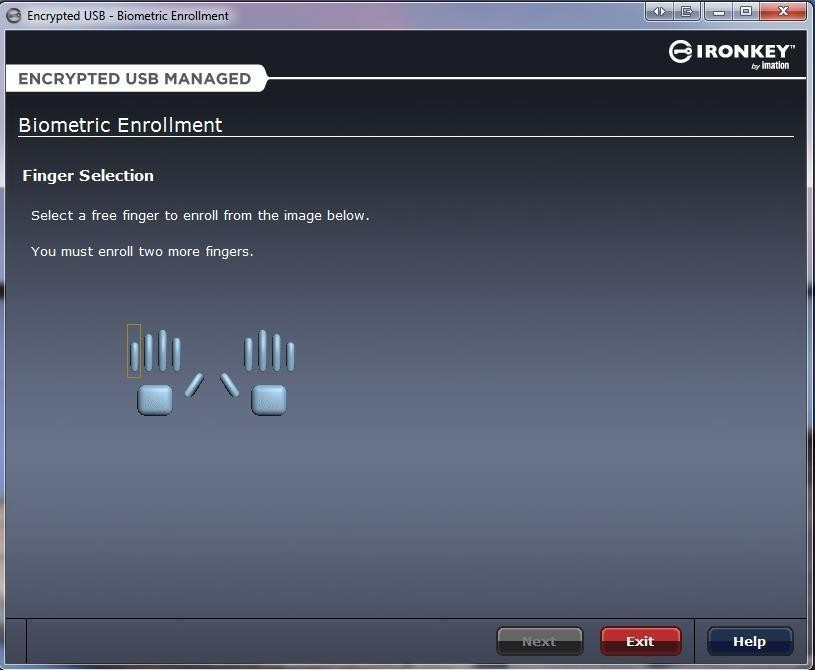
TYPE 2 - Biometric Devices
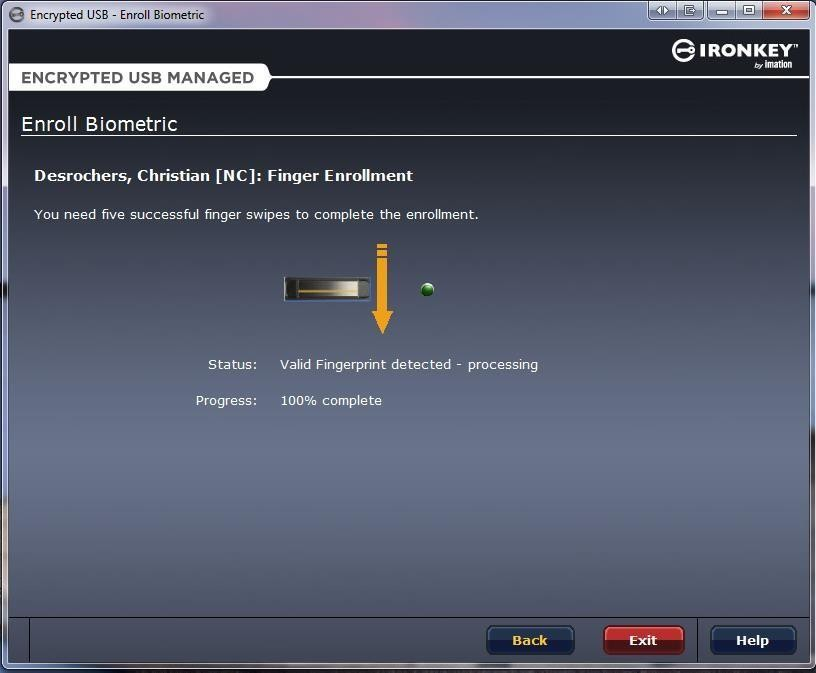
Two fingers will need to be scanned to activate the biometric device. Refer to the “eUSB Troubleshooting Guide” for scanning tips.
On the screen, with your mouse select the first finger to get scanned:
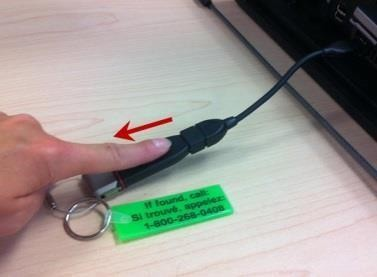
On the eUSB special sensor, you will scan this finger 5 times to ensure an accurate reading.
Note: Each successful scan will increase the “Progress” line by 20%.

Scanning Finger
Swipe finger away from the computer to the end of the eUSB device.
Once the “Progress” line has reached 100%, the first finger registration is complete. You will be prompted to select a second finger and repeat the scanning process for this finger.
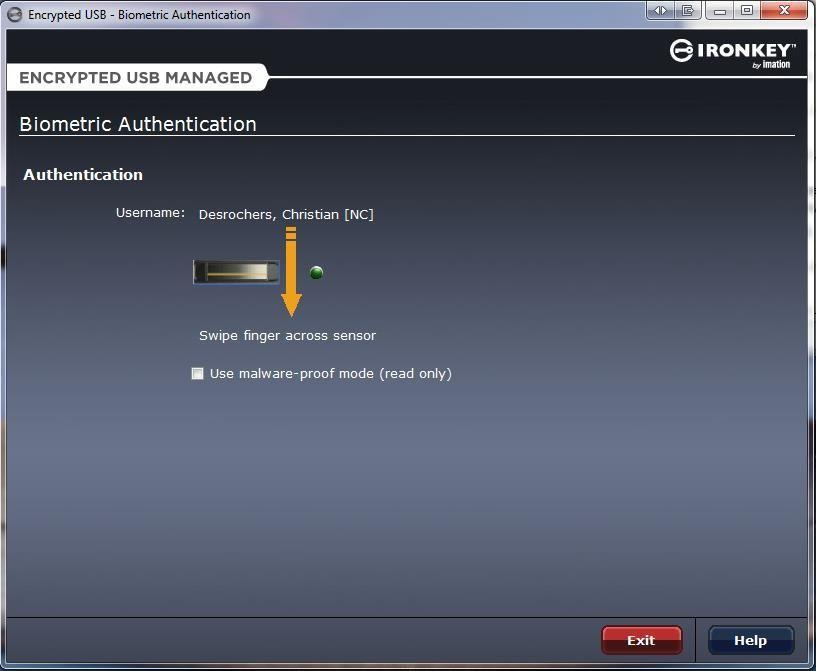
As soon as the finger registration is complete, you will be automatically prompted to authenticate to your eUSB device – scan one of your selected fingers:
Note: If the above window does not open automatically, do the following:
- Click on Windows start icon ,
- Click on Computer
- Locate and click the Application Drive on the left side of the panel
- Double click on the Start (Start.exe) icon on the right side of the panel.
- Wait a few seconds and if password prompt still does not appear, then open the “Encrypted USB folder”
- Double click on the “EncryptedUSBPresenter.exe” file. This should force the Biometric Authentication window to open.
Step 1 & 2
Step 3
If the window still does not launch, please submit a ticket request with the National Service Desk.
Refer to section “Logging Out and safely removing your eUSB device” to properly logoff and eject your device.
Employees using a Surface Pro Tablet and/or Windows 10 device can now plug in the initialized eUSB key. Refer to the Section Connecting your eUSB device to the Surface Pro Tablet and/or Windows 10 device.
Logging Into Your eUSB Device
Logging Into Your eUSB Device
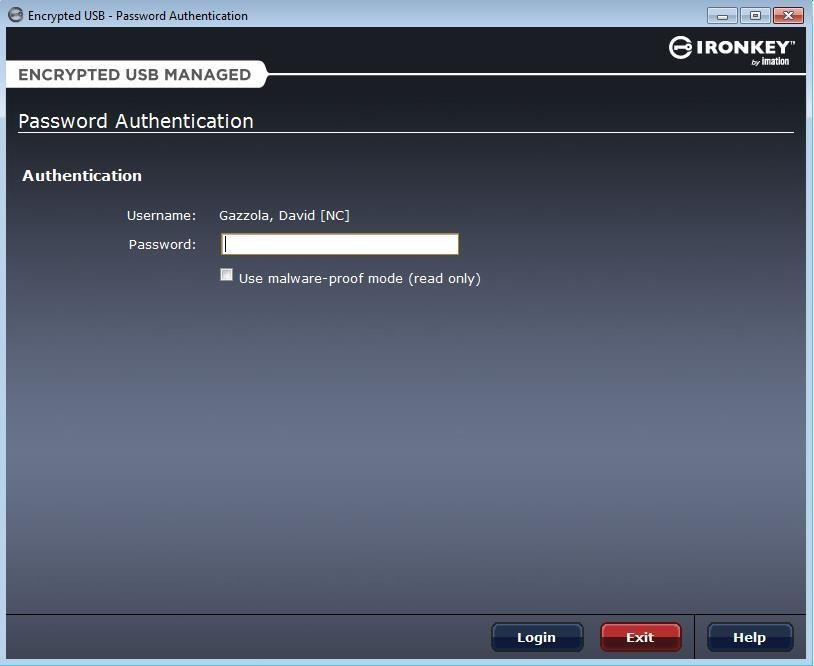
Each time you need to use your eUSB device, the login sceens below will be launched to request your password (for Password device) or to scan your finger (for biometric device).
WARNING: There are a limited number of attempts for a successful login.
Password Devices: You have 6 attempts on Password eUSB devices before a self-recovery is required.
Biometric Devices: You have 49 attempts before a self-recovery is required.
For additional troubleshooting tips, please refer to the “eUSB Troubleshooting Guide”.
Note:
The tick-box labelled “Use malware-proof mode (read-only)”, showing on the Password and Biometric authentication screen, will need to be checked when you are connecting your eUSB device to work on a high risk workstation.
This action will prevent the transfer of malware/viruses to your eUSB device while working on this workstation.
However, it will NOT allow you to add, save or modify any content stored on the eUSB device.
If the above screens do not launch automatically, do the following:
Note: If the above window does not open automatically, do the following:
- Click on Windows start icon
 ,
, - Click on Computer
- Locate and click the Application Drive on the left side of the panel
- Double click on the Start (Start.exe) icon on the right side of the panel.
- Wait a few seconds and then if password prompt still does not appear, open the “Encrypted USB folder”
Double click on the “EncryptedUSBPresenter.exe” file. This should force the Biometric Authentication window to open.
If the window still does not launch, please submit a ticket request with the National Service Desk.
- Click on Windows start icon
Connecting Your eUSB Device to the Surface Pro Tablet and/or Windows 10 device
Connecting Your eUSB Device to the Surface Pro Tablet and/or Windows 10 device
Once you have initialized the eUSB device on the Windows 7 Departmental laptop or desktop, you are now able to plug in the initialized eUSB key to your Surface Pro Tablet and/or Windows 10 device.
Each time you need to use your eUSB device, the login screen will be launched to request your password –for Password device– or for Biometric device, by swiping your finger on the fingerprint reader. A successful swipe will be indicated with a solid green light.
If the Password or Biometric Authentication screens do not launch successfully:
Right-click the Windows Start menu icon
and select File Explorer,- Locate and click the Application Drive on the left side of the panel
- Double click on the Start (Start.exe) icon on the right side of the panel.
- Wait a few seconds and if password prompt still does not appear, then open the “Encrypted USB folder”
Double click on the “EncryptedUSBPresenter.exe” file. This should force password window to open.
Step 1 & 2
Step 3
If the Password or Biometric Authentication window still does not open, please submit a ticket request with the National Service Desk.
Refer to section “Logging Out and safely removing your eUSB device” to properly logoff and eject your device.
- Locate and click the
Accessing Your Content
Accessing Your Content
Your eUSB device is now ready to use. You can access your eUSB “private” workspace via My Computer as you would any of your drives. You will notice that the device has two drive letters:
- The drive letter with the grey, circled key contains the system files needed to use the eUSB device: it is read-only and you will NOT be permitted to save data on it.
- The drive letter identified as “PRIVATE” (when logged onto your eUSB device) is “your personal eUSB workspace”. If you prefer, you can rename the PRIVATE drive with a file name of your choice.
- This is the disk space where you can save your content

Note: When logged off from your eUSB device, the PRIVATE drive letter is labeled “Removable disk”.
For eUSB external hard drive, this drive letter will always be identified as “Removable disk”.
- The drive letter with the grey, circled key
Logging out and safely removing your eUSB device
Logging out and safely removing your eUSB device
- Click on the grey, circled key located on the system tray (bottom right hand corner of your desktop).
- Select “Logout”;
- Click on the grey, circled key again;
- Select “Eject Device”; Click “OK”
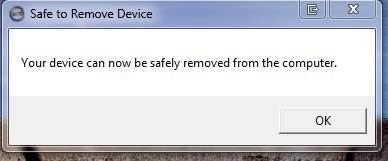
- Safely remove your device from the computer.
- Click on the grey, circled key
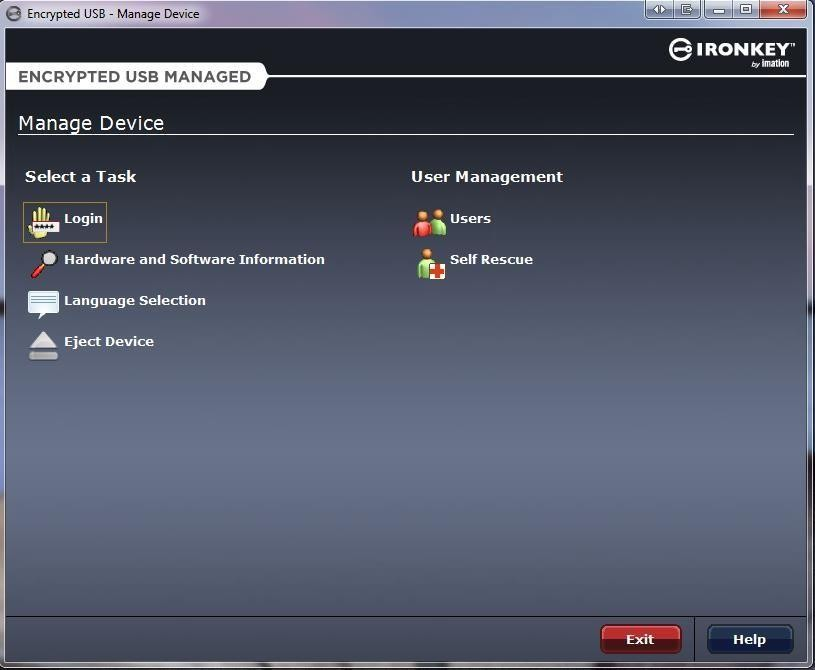
Recovering your eUSB Device
Recovering your eUSB Device
A self-recovery of your eUSB device is required for the following reasons:
- You have forgotten your password
- You initialized your key on one device but your work device has been replaced and/or you are plugging in the eUSB key in a different device.
- You have not used your eUSB key for more than 90 days and your password has expired
WARNING: There are limited attempts for a successful login to your eUSB devices (password or biometric) – you will be able to do a self-recovery before you reach the last attempt. Please refer to the “eUSB Troubleshooting Guide” for extended troubleshooting tips.
If you are unable to access your PRIVATE drive (forgotten password/unreadable finger print), you can do a self-recovery, using the software on the eUSB device:
- Click on the grey, circled key located on the system tray (bottom right hand corner of your desktop).
- Select “Manage Device”:
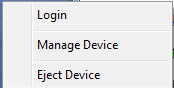
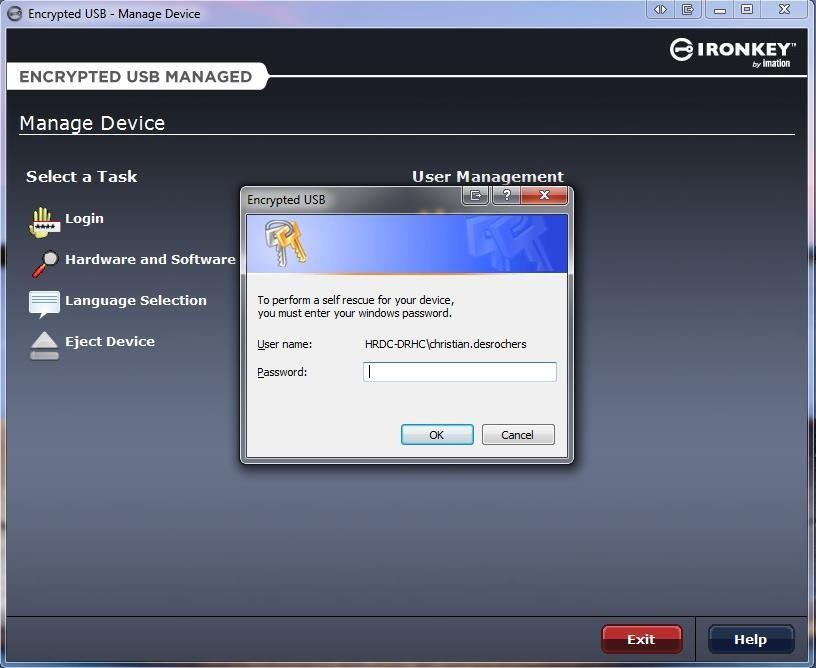
- Select “Self Rescue” from the following menu:
- Enter your Active Directory credentials (i.e. Windows Password).
Your authentication information on your eUSB device will be reset and you will be prompted to set your password or rescan your finger prints one more time. Refer back to section: “Step 3: Setting a Password/Biometric ID” for the steps to follow.
Conclusion
Conclusion
If you have any issues with the device please refer to the “Encrypted USB Device Troubleshooting Guide”. For special assistance, submit an online service request to the National Service Desk.