Getting Started with OneNote 2016: An ESDC Employee Guide
Welcome to OneNote 2016
Microsoft OneNote is a digital notebook that provides a single place for all of your notes and information – everything you need to remember and manage in your projects or regular activities.
In OneNote, your notebooks never run out of paper. They are easy to organize, print, and share, and you can search all your notes quickly so you can find notes even if you forget where you put them. OneNote uses notebooks, sections and pages to help you stay organized.
This software will be new to many ESDC employees, not having received emphasis in previous versions. If you used OneNote previously, anything you created will follow you into OneNote 2016, similar to other Office products such as Word, Excel or PowerPoint.
This guide will provide instructions for the most common functions, with steps on how to complete the basic tasks to get you started with OneNote.
Getting Started
To open OneNote, select your Windows Start menu and choose All Programs. You will find OneNote in the Microsoft Office 2016 folder.
To create a new notebook, select New from the File menu and save to an approved local or network location.
You can create multiple notebooks, and sections within each, to organize your work:
- To rename a section within a notebook, right-click on the tab, then select Rename and type a name.
- You can create more sections by selecting the tab with the plus sign.
Once you have created your notebooks, you can take notes within these notebooks on the selected page:
- To type or write notes on a page, click wherever you want them to appear on a page, and start typing.
- If you want to begin a note elsewhere on the page, just place your cursor and start typing there.
- To add a page title, select the page header area at the top and type the title. Titles also show up in page tabs near the right side of the page.
- To change the order of your pages, drag any page tab to a new position.
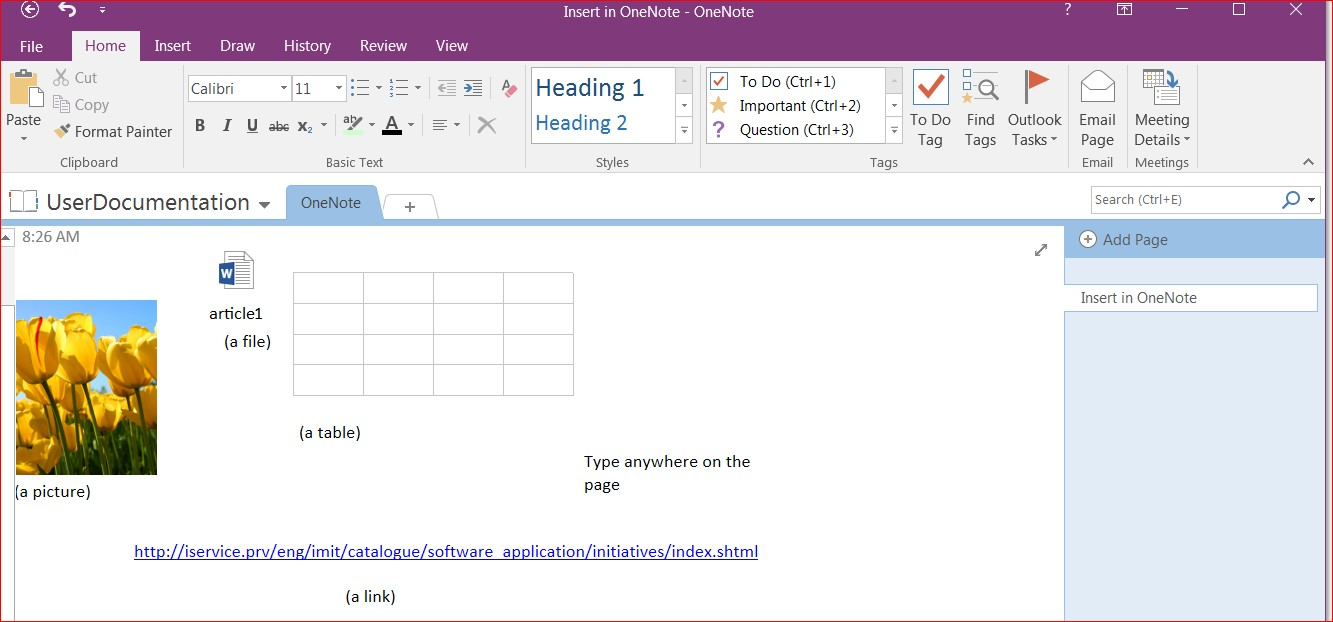
Basic functions work the same as they do in other Office applications. The following image shows examples of elements you could add to your notes pages.
Tip: OneNote doesn’t have a Save button. That’s because you never have to save your work in OneNote like you do in other applications. As you work in your notebooks, OneNote automatically saves everything for you.
Using OneNote
Add or Rearrange Tabs and Pages
Select the + (plus sign) tab to add a new Section to a notebook. Right-click on any tab for other functions such as Delete, Move or Copy, Rename, or to change the section colour. Similar options are available for pages at the right-hand side of the notebook.

Insert Links
You can insert a hyperlink into your notes to make links to text, pictures and to other pages and sections of your notebooks.
Example: to add a link to an internet location, on the page where you would like the link added, select Insert, Link on the ribbon menu. In the Link dialog box, type or paste the location into the Address field and then select OK.
Add Files to Your Notes
You can keep all of your information about any subject or project together in one place, including copies of related files and documents:
- Select Insert, File Attachment.
- Select one or more files and then choose Insert.
- Inserted files show up as icons on your notes page. Use any icon to open the file.
Insert Pictures
You can insert pictures into your notes: select Insert, and locate the picture to insert from a stored location or from an online location.
Insert a Table
You can create and insert a table directly on a notes page by selecting Insert, Table.
Create Meeting Notes
In Outlook, open the meeting and select Meeting Notes from the ribbon menu. You will be presented with a dialogue box of your notebooks from which to select where to add the notes. Once you select the location, a new page will be added to start your notes. All relevant information about the meeting will be added to the note, including the date, time, those invited and the subject.
Customizing
Notebook Pane (list of notebooks)
The Notebook pane displays a list of open notebooks at the left-hand side of the screen that you can easily navigate among. To keep this list visible: select the first tab at the top left (i.e. name of the currently open notebook) to view a drop-down menu. At the top right corner of this menu, you will see the silhouette of a push-pin. Select this symbol to maintain the Notebook pane as an open feature.
Tags
Prioritize or organize notes with dozens of searchable tags from the default list, or customize your own tag.
Customizing View Settings
- To customize default font settings:
- Go to File
- Select Options
- In the dialogue box, be sure the General tab is selected, then look for the Default font section
- Choose your Font, Size, and Font color
- Select OK

-
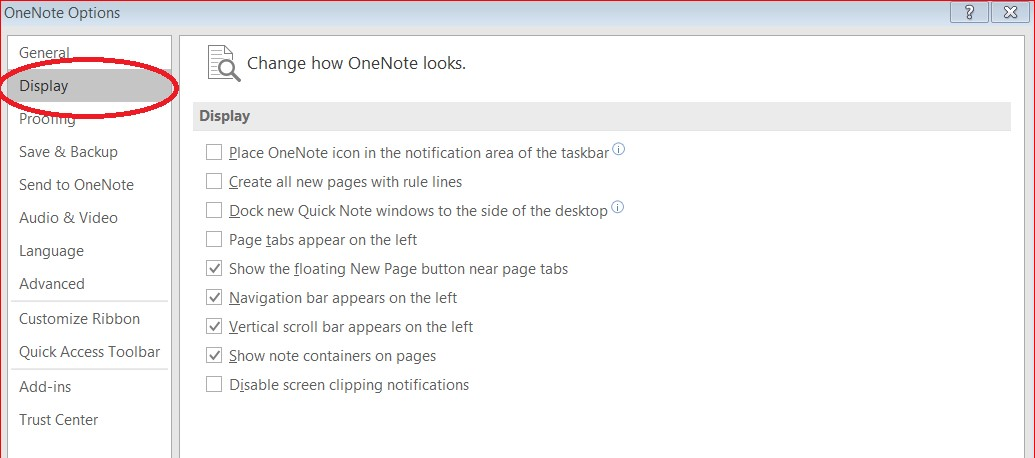
To customize default display settings, select File > Options > Display. Changes such as whether Page Tabs, Navigation Tabs, or the Scroll Bar will appear on the left of the interface, or if new pages have lines or not, can be made here.
- Change note paper size by selecting View > Paper Size to change properties such as width and height.
-
Change the colour of your section tabs to be even more organized.
- Right-click the section
- Select Section Colour
- In the menu that appears, choose the desired colour
Note: You can also choose None if you prefer not to use any of the colours that are available in the Colour Picker. Customize the Quick Access Toolbar to streamline tasks to remove the ones you don’t use and to add ones specific to your work that don’t appear in the list. To do so, select File > Options > Quick Access Toolbar, then move the desired tools from the main bank to your customized bank.
- Use Always on Top to keep a smaller note on top that would otherwise be hidden behind another note. You can find this Keep a Note feature on the far right side of the View menu.