Transferring Entrust Certificates to Mobile Phones
In order to create or view Entrust encrypted or digitally signed e-mail messages on your mobile phone, you must first transfer the Entrust certificates using self-serve portal or email. In all instances the first step is to export your certificates from your desktop or laptop.
- Note: You must export your certificates each time you receive a new or replacement mobile device. You must also export your certificates if their original certificates were replaced for whatever reason.
- Note: For iPhone only, to maintain the encryption you need to manually select the encryption option (Blue Lock) every time you reply or forward to an encrypted email.
- Please open an online Service Request with the National Service Desk if you encounter any issues.
These instructions are for Samsung and iPhone.
Steps
1. Export your Certificates from your Desktop or Laptop using ONE of these two procedures
A). Automated (preferred)
- Exporting Entrust certificates by Script
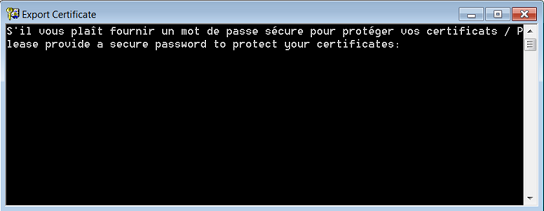
- In the "Export Certificate" window, type a password to protect your exported certificates, and then press "Enter" on your keyboard.
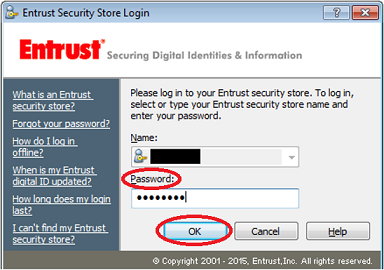
- Type in your Entrust password and click "OK".
- You will receive your exported Entrust certificates in two formats:
- By email
- On your F: network drive
- By email
- End of Step 1A
- Exporting Entrust certificates by Script
B). Manual
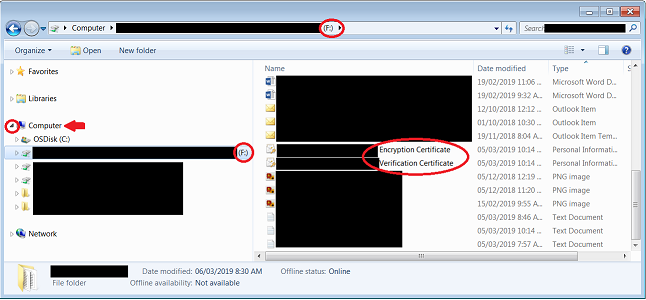
- You have two Entrust certificates, one for encryption (Encryption Certificate) and one for digital signing (Verification Certificate).
- In the tray area of your desktop, right-click the Entrust icon and click Entrust Certificate Explorer.

- Ensure Personal is selected in the left-hand panel. There will be two certificates in the right-hand panel with your e-mail address (Encryption and Verification Certificates).
Caution: The certificates may not be listed in alphabetical order on your computer. When exporting the certificates first look at the Friendly Name to confirm which certificate that is being exported:
- Lastname, Firstname's Verification Certificate
- Lastname, Firstname's Encryption Certificate
- Select and Right-click the first certificate and select Export Certificate:
- Enter your Entrust password (if asked) and click OK,
- In the Welcome to the Certificate Export Wizard click Next,
- Select Yes to export the private key and click Next,
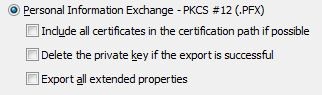
- Select the option below and click Next:
- Enter a strong password (at least 8 characters with numbers and symbols must be used to protect the integrity of the certificate (Note: this is a one-time password); then click Next,
- Click Browse,
- Specify the name of the file you want to export and select where to save it.
Name the file Encryption or Verification based on the certificate name you have selected. - Click Save,
- Note the path of the file name to use at a later step.
- Select Next in the Certificate Export Wizard.
- Select Finish on the Completing the Certificate Export Wizard page.
- You will see a pop-up message confirming the export was successful. Click OK.
- Right-click the second certificate and select Export Certificate.
- Repeat step 4.
- You can exit the Entrust Certificate Explorer.
- End of Step 1B
2. Transfer your Certificates
Transfer your certificates using one of these two procedures:
A. Certificate Transfer Using Self-Service Portal
Samsung
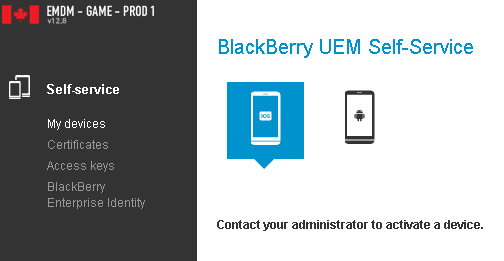
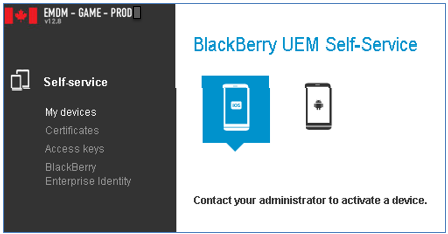
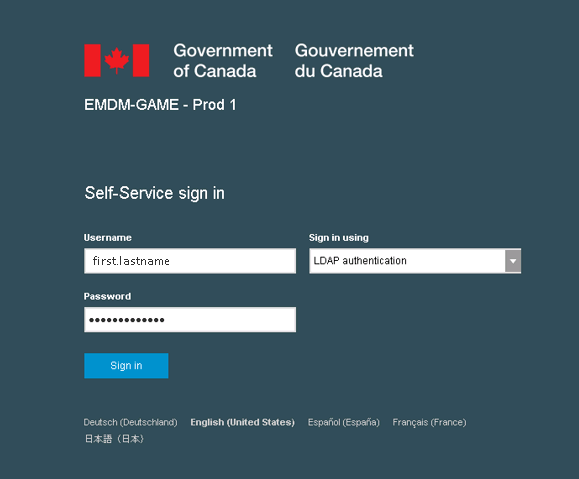
- On your computer, go to EMDM-GAME - Prod 2 to access the self-serve portal.
- Once you are on the Self-Service Portal main page, change the Sign in using field to LDAP authentication.
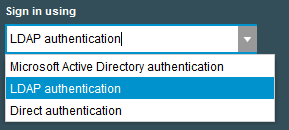
- (NOTE: by selecting LDAP authentication, the Domain field will disappear.)
- Input your Windows username in the Username field (the same one you use to log into your work computer).
- Input your Windows password in the Password field.
- Click Sign in button.
- NOTE:If you receive an error message, please proceed to the appropriate Certificate Transfer using Email section and follow that procedure. In order to resolve the Self-Service Portal issue, please open an online Service Request with the National Service Desk. The user account requires recreation and reactivation.
- Upon successful login, the following will appear:
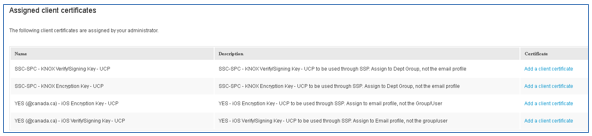
- Click on Certificates on the left-hand side of the screen.
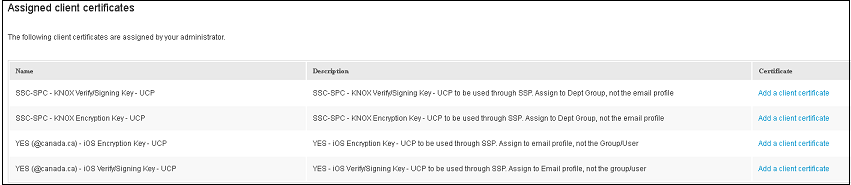
Note: If under the Certificate column you see that you have previously uploaded certificates (i.e., you see the name of a certificate instead of "Add a client certificate"), you must first delete them from this screen before proceeding. - Under Assigned client certificates, click on Add a client certificate for your respective device (KNOX for Samsung, iOS for iPhone) type for your Verify/Signing key.
- Click Browse,
- If you used the automated method to export your certifications from your Desktop or Laptop, navigate and select your Signing/Verification key located in your F: drive (Surname, FirstName's Verification Certificate) and then click Open.
- If you used the manual method to export your certifications from your Desktop or Laptop, navigate and select your Signing/Verification key you previously saved on your local computer (Verification) and then click Open.
- Type the password for your Verify/Signing key in the Password field.
- Click Add.
- Under Assigned client certificates; click on Add a client certificate for your respective device type for your Encryption key.
- Click Browse,
- If you used the automated method to export your certifications from your Desktop or Laptop, navigate and select your Encryption key located in your F: drive (Surname, FirstName's Encryption Certificate) and then click Open.
- If you used the manual method to export your certifications from your Desktop or Laptop, navigate and select your Encryption key that you previously saved on your local computer (Encryption) and then click Open.
- Type the password for your Encryption key in the Password field.
- Click Add.
- Click Log out within the Self-Service Portal. (Next step will be on your Samsung phone.)
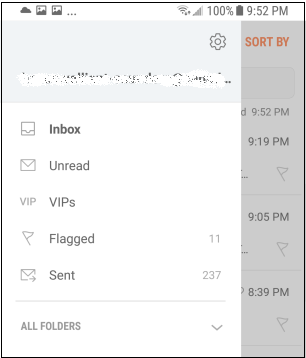
- On your Samsung phone, open the email client on Knox/Workspace.
- Tap
 (Menu) in the email client main menu.
 - Tap
 (Menu) in the email client main menu.
- Tap on your email address in the Accounts section.
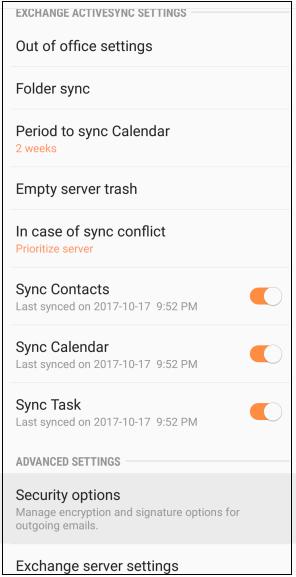
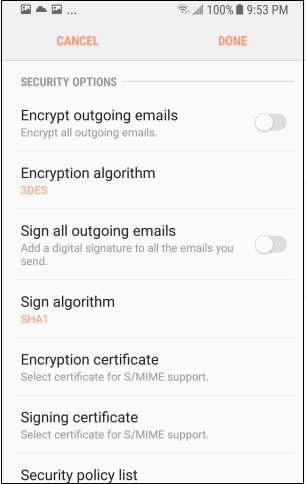
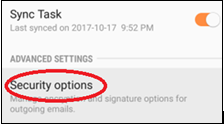
- Scroll down and tap the Security Options menu.
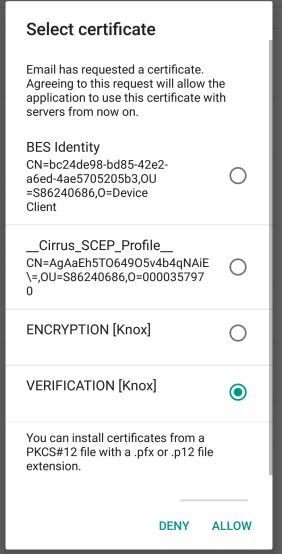
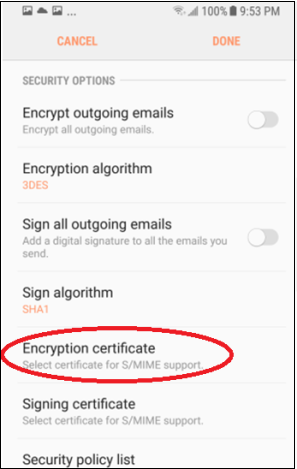
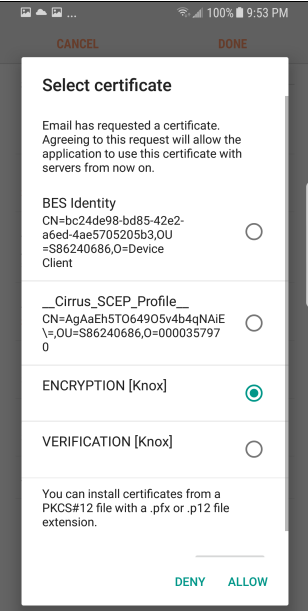
- Select Encryption Certificate.
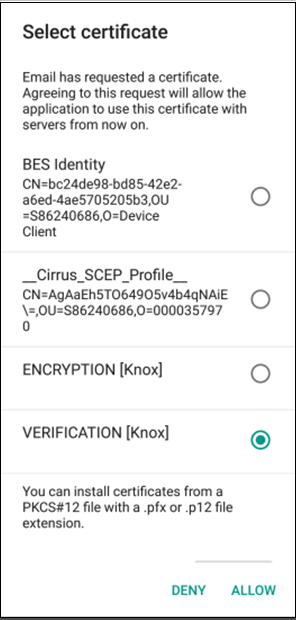
- Select Encryption radio button.
- Select Allow.

- The email application should return to the selection dialog again.
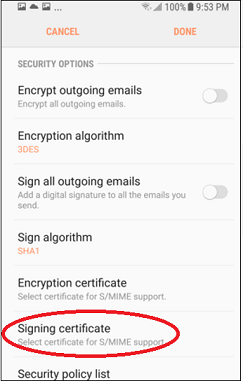
- Select Signing Certificate.
- Select Verification radio button.
- Select Allow.
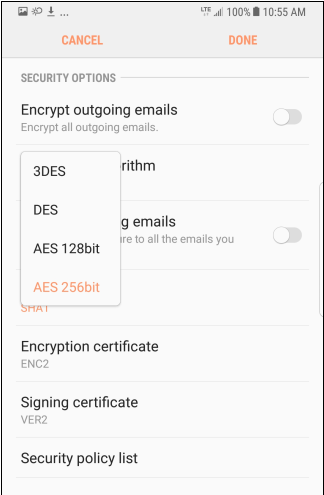
- Select Encryption Algorithm dropdown.
- Select AES 256bit. (Note: AES 128bit may need to be selected if you have not been upgraded to SHA2 certs yet)
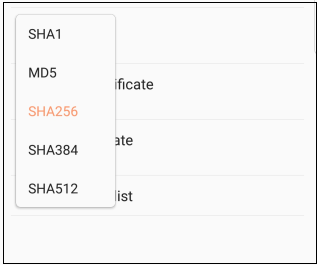
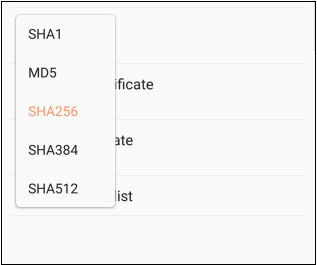
- Select Sign Algorithm.
- Select SHA256. (Note: SHA1 may need to be selected if you have not been upgraded to SHA2 certs yet)
- Select Done at top right of the screen to exit the email client Security Options dialog.
- Go to Testing the Certificates on your Device section to test.
- End of Samsung Step 2A
iPhone
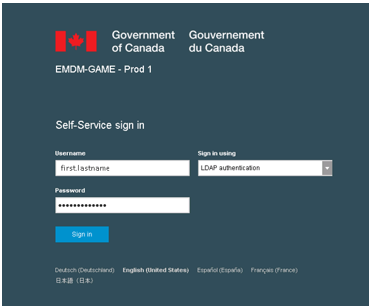
- On your computer, go to EMDM-GAME – Prod 2 to access the self-serve portal.
- Once you are on the Self-Service Portal main page, change the Sign in using field to LDAP authentication
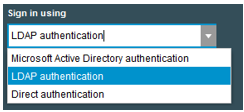
- (NOTE: by selecting LDAP authentication, the Domain field will disappear.)
- Input your Windows username in the Username field (the same one you use to log into your work computer).
- Input your Windows password in the Password field.
- Click Sign in button.
- NOTE: If you receive an error message, please proceed to the appropriate Certificate Transfer using Email section and follow that procedure. In order to resolve the Self-Service Portal issue, please open an online Service Request with the National Service Desk. The user account requires recreation and reactivation.
- Upon successful login, the following will appear:
- Click on Certificates on the left hand side of the screen.
- Note: If under the Certificate column you see that you have previously uploaded certificates (i.e., you see the name of a certificate instead of "Add a client certificate"), you must first delete them from this screen before proceeding.
- Under Assigned client certificates, click on Add a client certificate for your respective device (KNOX for Samsung, iOS for iPhone) type for your Verify/Signing key.
- Click Browse, navigate and select your Signing/Verification key that you previously saved on your local computer (Verification) and then click Open.
- Type the password for your Verify/Signing key in the Password field.
- Click Add.
- Under Assigned client certificates; click on Add a client certificate for your respective device type for your Encryption key.
- Click Browse, navigate and select your Encryption key that you previously saved on your local computer (Encryption) and then click Open.
- Type the password for your Encryption key in the Password field.
- Click Add.
- Click Log out within the Self-Service Portal.
The process is now complete. Please wait ~5 minutes for the profile to be pushed to your device. If you open the mail application too early, you can expect the mail application to close when to profile is being pushed. Afterward proceed to Step 3: Email Test
- End of iPhone Step 2A
- ** Should you not be able to log into the portal; you can use the email process instead (method B. below).
B. Certificate Transfer Using Email
Samsung
- Use this email procedure if you were not able to log into the self-serve portal.
- After you have exported and saved your certificates to your desktop/laptop, then create an e-mail message, address it to yourself and attach the two certificates you just saved (ensure email message subject line does not describe the message content).
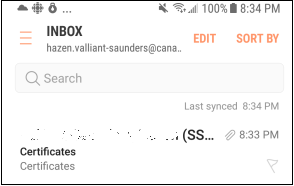
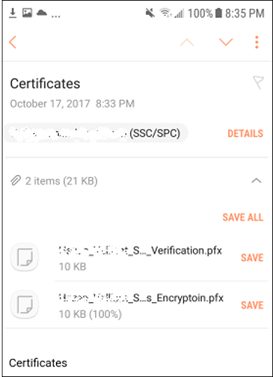
- From the Android Mobile Device email, select the email with the certificates attached to it.
- Within that E-mail tap Save beside the Encryption certificate.
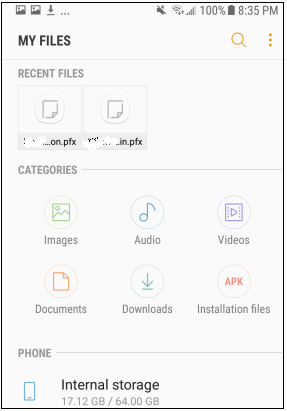
- Exit the email client and open the MY FILES within KNOX/WORKSPACE.
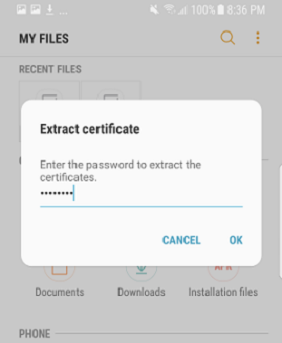
- Select the Encryption.pfx file.
- Enter the previously created password and tap OK.
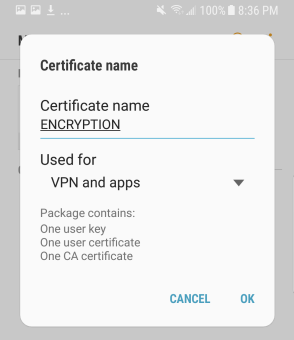
- Change the certificate name to Encryption and tap OK.
- Upon successful certificate import, Encryption installed will be displayed at the bottom of the screen.
- Repeat steps 1-7 and substitute Verification for Encryption in all steps to import the Verification Certificate.
- Continue upon successful installation of both Encryption and Verification certificates.
- Open the email client on Knox/Workspace.
- Tap the 3 bars to open the email client main menu.
- Tap the Settings cog icon in the upper right-hand corner.
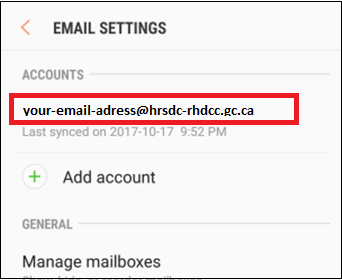
- Tap on your email address in the Accounts section.
- Scroll down and tap on Security Options.
- Select Encryption Certificate.
- Tap Encryption Radio Button, and tap Allow.
The email application should return to the selection dialog again.
- Tap Signing Certificate.
- Tap Verification radio button and tap Allow.
- Tap Encryption Algorithm drop down and tap AES 256bit. (Note: AES 128bit may need to be selected if you have not been upgraded to SHA2 certs yet)
- Tap Sign Algorithm, and tap SHA256. (Note: SHA1 may need to be selected if you have not been upgraded to SHA2 certs yet)
- 21. Select Done at top right of the screen to exit the email client Security Options dialog.
- Go to Testing the Certificates on your Device section to test.
- End of Step 2B
- End of Samsung Step 2
iPhone
Use this email procedure if you were not able to log into the self-serve portal.
Important: This procedure will only work if iOS 12.0 and above is installed on your mobile phone. To check the version on your iPhone, tap Settings > General > About > Version.
- On your computer or laptop, create an e-mail message, address it to yourself and attach the two certificates you saved when you completed the procedure in Step 1 (ensure email message subject line does not describe the message content).
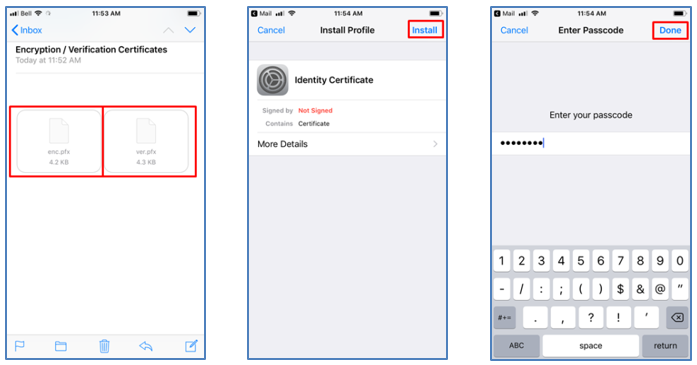
- On your mobile phone, open the email you just sent to yourself.
- Start by opening the .pfx file for either Signing or Encryption by tapping on it.
- When prompted, tap Install.
- Enter the device passcode, press Done.
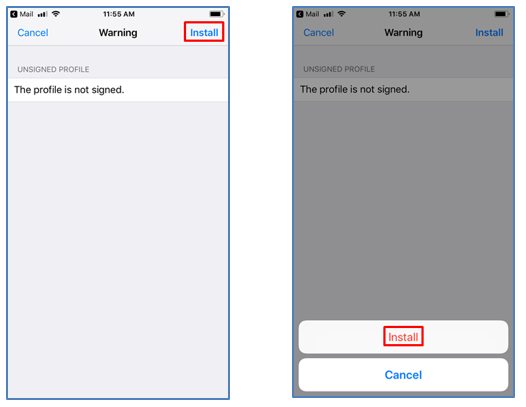
- Confirm installing the unsigned profile by tapping Install, then Install.
- Enter the passphrase, which protects the Identity Certificate file, then click Next.
- That will install the certificate on the device, you should then click Done.
- Repeat steps 2-8 again and substitute Verification for Encryption in all steps to import the Verification Certificate.
Once both certificates have been imported, you'll need to choose the cert on the account to use it for S/MIME.
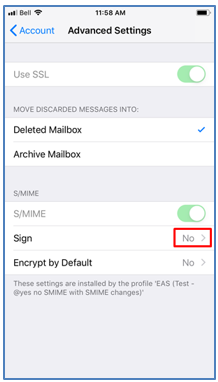
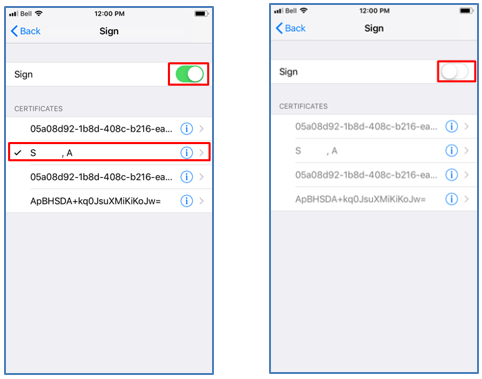
Follow the next steps on how to do so.- In the Settings app, Navigate to Passwords & Accounts > [ The GoC mail account ] > Account > Advanced Settings, in the S/MIME section, tap Sign.
- In the Sign settings, toggle Sign on, tap the newly installed certificate (tap the i button to inspect the cert's details if required), then toggle Sign off again, and tap Back.
- Note: We toggle the slider to select the signing certificate, but then turn it back off so not every message gets sent as "Signed" by default.
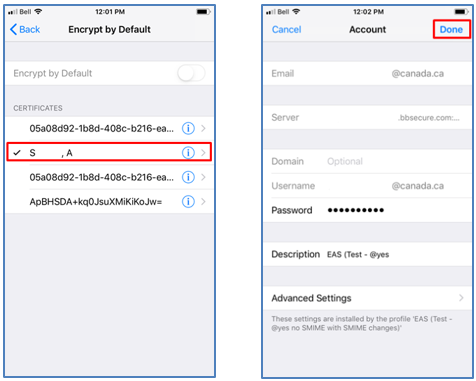
- Go back and tap the newly installed certificate for Encrypt by Default.
- Finally, tap the Back button, tap Account, and tap Done to save your selections.
- End of iPhone Step 2B
3. Email Test
- Once all the steps to import the certificates to your device are completed, test that the certificates are working by sending yourself an email that is encrypted and verify you can open and read its contents.
- Create an email to yourself.
- Select Security Options in the Options Menu and select Encrypt; then select Done and select Send.
- Verify that you have received and can read the Test email.
- Once all the steps to import the certificates to your device are completed, test that the certificates are working by sending yourself an email that is encrypted and verify you can open and read its contents.