Add/Remove Owners from a Group or List
Note: To add or remove owners from a group or list, you must first be designated as an owner of that group or list. Otherwise, you may not see all of the menu items described below.
Adding an Owner to a Group or List
- Open the Group Management Portal (opens new window).
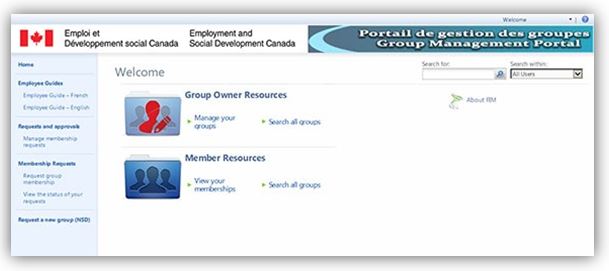
- Under Group Owner Resources, select Manage your groups.

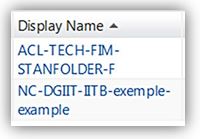
- From the Display Name column, select the group or list’s hyperlink to open the detail window for that group/link.
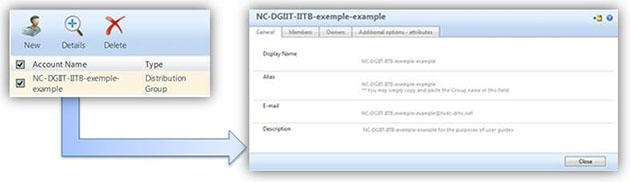
Note: If you put a checkmark beside the Group (in the Account Name column) and then select the Details icon from the top menu bar, this will open a Read Only window. You can only access general information about the group or list from this view.
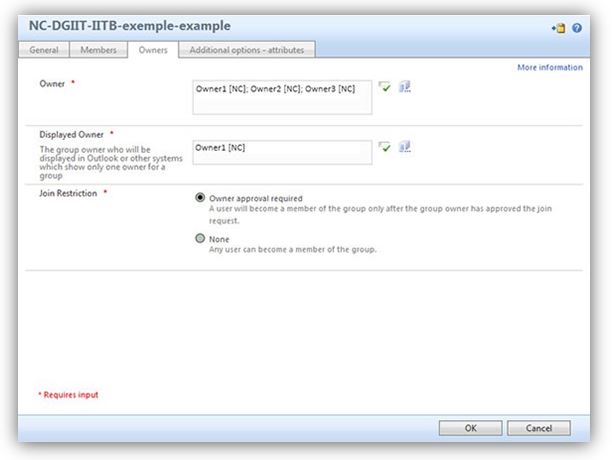
- In the Details window for the group or list, select the Owners tab to view the current owners. You can use the scroll bar to review all current members.
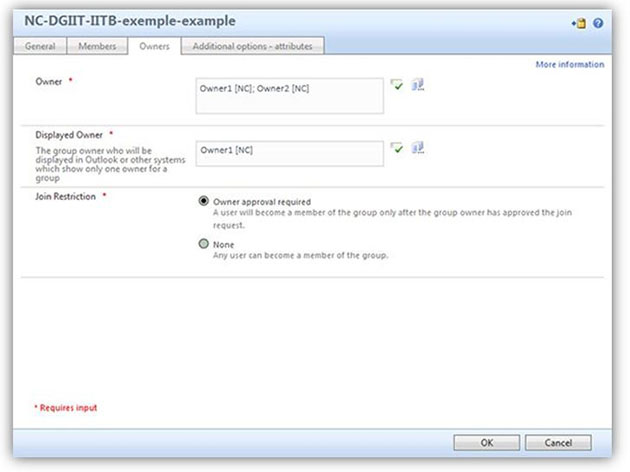
- In the Owners box, enter the name of the employee to be added as an owner (last name, first name) as it appears in their e-mail address.

Note: If you wish to add multiple names, separate them with a semi-colon (;).
- Select the green checkmark icon
 to validate and resolve the name you have entered. If the name cannot be resolved, the name will be underlined in red. Delete the entire name underlined in red, then you may either:
- Re-renter the name correctly.
- Select the Browse button
 and search using first or last name, or by key word, for the employee to be added to the list. Put a checkmark next to the name and click OK.
- When the name has been resolved and appears correctly in the Owner box, select the OK button.
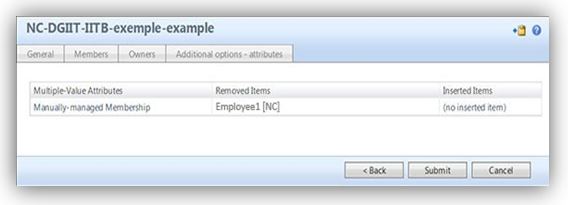
- In the next window that appears, verify that the name(s) details appear in the Insert Items column, then select the Submit button.

Note: Approval of this change is not required, since you are an owner of the group.
Removing an Owner from a Group or List
- Open the Group Management Portal (opens new window).
- Under Group Owner Resources, select Manage your groups.
- From the Display Name column, select the group or list’s hyperlink to open the detail window for that group/link.
Note: If you put a checkmark beside the Group (in the Account Name column) and then select the Details icon from the top menu bar, this will open a Read Only window. You can only access general information about the group or list from this view.
- In the Details window for the group or list, select the Owners tab to view the current owners. You can use the scroll bar to review all current owners.
- In the Owners box, select the name of the owner to be removed and press the Delete key on your keyboard. Repeat this step for each owner you want to remove from the group.
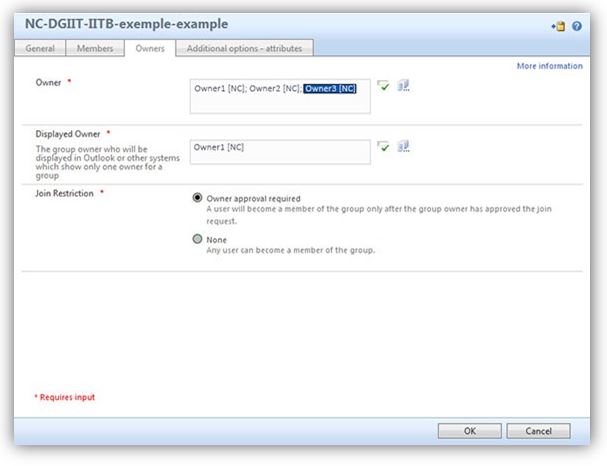
- Once these names have been removed, select the OK button, then verify your request and select the Submit button.
Note: Approval of this change is not required, since you are an owner of the group.
Changing a Display Owner for a Group or List
The Displayed Owner is the name of the owner who will be displayed as the group's owner for the Security Group or in Outlook Properties as the list's Manager.
Note: There must always be an identified Display Owner. You will receive an error message and no actions can be completed until the appropriate field has a validated name entered.
- Open the Group Management Portal (opens new window).
- Under Group Owner Resources, select Manage your groups.
- From the Display Name column, select the group or list’s hyperlink to open the detail window for that group/link.
Note: If you put a checkmark beside the Group (in the Account Name column) and then select the Details icon from the top menu bar, this will open a Read Only window. You can only access general information about the group or list from this view.
- In the Details window for the group or list, select the Owners tab to view the current owners.

- In the Display Owner box, select the name of the owner to be removed and press the Delete key on your keyboard.

Note: This field cannot be left blank. You will receive an error message and no actions can be completed until the field has a validated name entered.

- Enter the name of the employee to be added as an Display Owner (last name, first name) as it appears in their e-mail address. Click on OK.

- Select the green checkmark icon to validate and resolve the name you have entered. If the name cannot be resolved, the name will be underlined in red. Delete the entire name underlined in red, then you may either:
- Re-renter the name correctly.
- Select the Browse button and search using first or last name, or by key word, for the employee to be added to the list. Put a checkmark next to the name and click OK.
- Verify your request and select the Submit button.

Note: Approval of this change is not required, since you are an owner of the group.