Desktop Videoconferencing (with Skype): Equipment Installation
September 2015
Step 1: Shut Down Your Computing Device

Begin by shutting down your computing device. This will ensure that it properly recognizes the new equipment you will be installing in the next steps.
Step 2: Plug in Your Webcam
Connect your USB webcam to a vacant USB port on your computing device. If you are using a laptop, ensure the camera is plugged into the docking station. (Note that cameras and headsets are permitted USB connections on the ESDC network.) You may need to remove its lens cap. On most models a light indicates when the webcam is in use.
Step 3: Audio Device

Follow the appropriate illustration in the Appendix to connect your headset (wireless or wired). If you have a laptop, ensure your headset is plugged into the docking station.
Step 4: Confirm Enabling
To confirm your Skype video conferencing capabilities has been enabled, when you start an Instant Message (IM) window (e.g. with a colleague) the Video menu should now be available.

Adjusting Your Webcam Settings
-
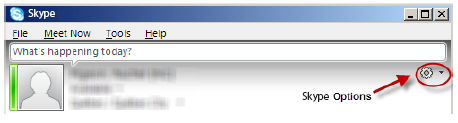
To change your webcam settings, in Skype select the down-arrow next to the Options button.
-
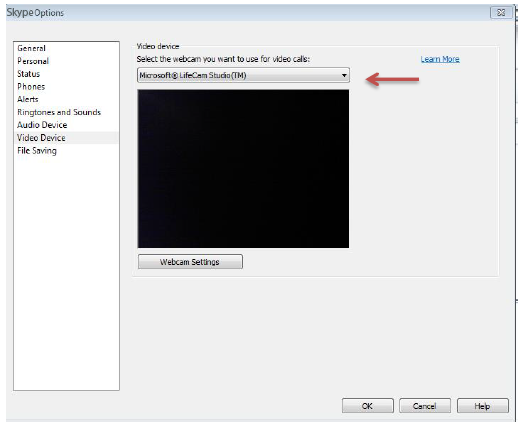
Choose Tools, then Options to open the Options window, then select Video Device.
You should see the name of your webcam listed here. If you see nothing, try reinstalling your webcam using a different USB slot on your computing device. If another camera is listed, you may be using a laptop with a built–in camera. In that case, select the down-arrow next to the camera name to select your webcam (e.g. Microsoft LifeCam Studio).
-
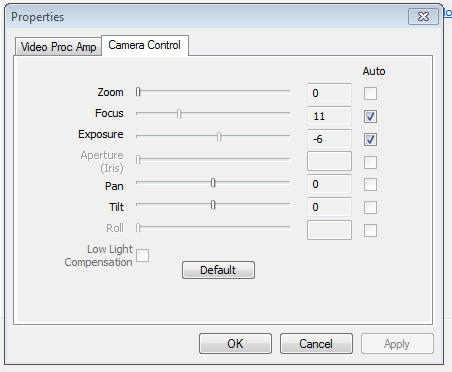
Next, select the Webcam Settings button. Although the default settings are normally adequate, some settings can be adjusted. On the Camera Control tab you can adjust the zoom and exposure levels to optimise the image.
-
Use the OK button to save your changes, and exit the Options window.
Adjusting Your Audio Device Settings (Headphones)
-
To change your audio device settings, in Skype select the down-arrow next to the Options button.
-
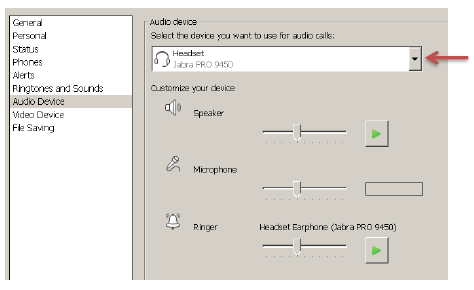
Select Tools, then Options to open the Options window, then choose Audio Device.
You will see the name of the default audio device associated with Skype. You may need to select the down-arrow button next to the device name to choose the audio device you will use for videoconferencing. If you don’t see your headset, try reinstalling your headset using a different USB slot on your computing device.
-
Adjust the volume sliders to increase/decrease volume levels, finding what’s comfortable for you.
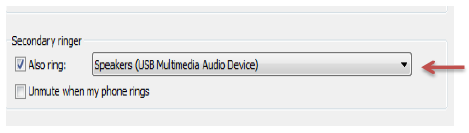
Note: the Secondary Ringer causes an additional device (e.g. your monitor or desktop speakers) to ring when you receive an incoming call (e.g. to a videoconference). This is useful when you aren’t wearing your headset. Select the down-arrow button to identify the additional device you prefer.
-
Select the OK button to save any changes, and exit the Options window.
Appendix: Wiring Diagrams
-
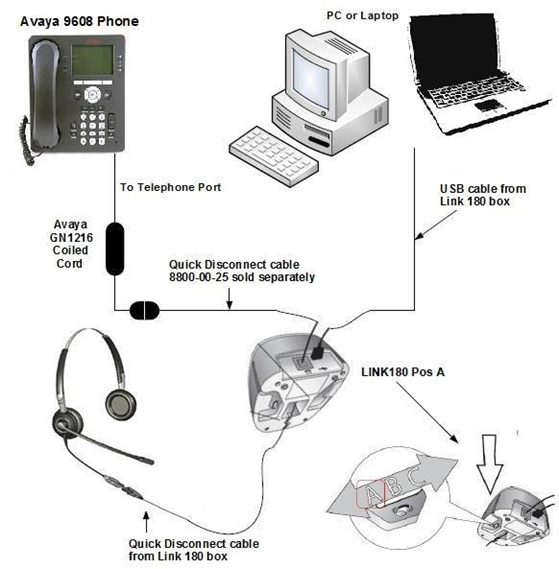
Diagram 1: Typical Wireless Audio Setup
For both telephone and videoconferencing

Long description
Diagram 1: setup example
- Jabra ProTM 9450's Telephone Port connects to the Avaya 9608 Phone.
- Jabra ProTM 9450's USB Port connects to a PC or Laptop.
-
Diagram 2: Typical Wired Audio Setup
For both telephone and videoconferencing
Long description
Diagram 2: setup example
- LINK 180 unit has a set switch (selections are A, B and C). Set switch to position A.
- LINK 180's audio in/out port connects to the headset via Quick Disconnect cable.
- LINK 180's USB port connects to a PC or Laptop.
- LINK 180's Telephone Port connects to the Avaya 9608 Phone via the Avaya GN1216 Coiled Cord along with a Quick Disconnect cable 8800-00-25 (sold separatly).